- Wi-Fi Calling allows you to make and receive calls over a Wi-Fi network rather than a weak cellular signal.
- To enable Wi-Fi Calling on an Android, go to the Phone app Settings, select your SIM card and “Make calls using Wi-Fi.”
- Once activated, calls will automatically switch to Wi-Fi whenever available so your call quality will be clear.
Have you ever been somewhere where your mobile network is weak? Like in a basement, or in an office? You might still see that the cellular signal is full, but still, you’re having trouble making calls. That’s where Wi-Fi calling comes in.
Wi-Fi calling lets you make calls and receive calls over a Wi-Fi connection instead of relying on your cellular. But how do you enable Wi-Fi calling on Android?
In this guide, I will show you how to turn on Wi-Fi calling on Android devices. By the end, you’ll get everything set up and ready to make very clear calls, even if the cellular signal is weak.
Also, read How To Enable And Use WiFi Calling On Your iPhone
What is Wi-Fi Calling and why use it?
Wi-Fi Calling is a feature that allows you to make and receive calls over a Wi-Fi network instead of a cellular network. This means:
- No more dropped calls due to weak signals.
- Better call quality, especially indoors.
- No need for third-party apps like WhatsApp or Skype.
- Works seamlessly with your regular phone number.
How to Enable Wi-Fi calling on your Android device
The steps to enable Wi-Fi calling may vary depending on your device model, Android version, and carrier. However, the general process is the same for most devices.
Here are the steps to enable Wi-Fi calling on your Android device that uses the Google Phone app as the default dialer.
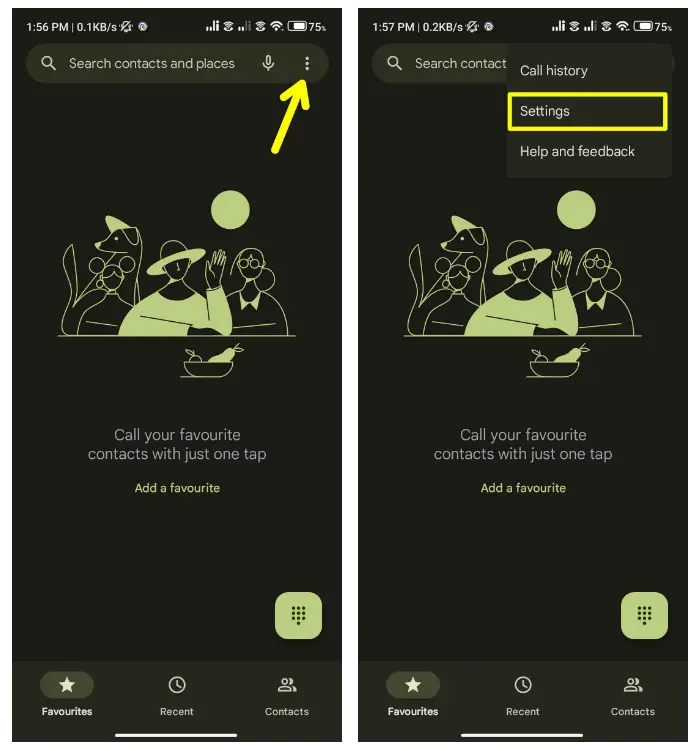
1. First, open the Google Phone app on your Android device, tap on the three dots in the top right corner, and select Settings.
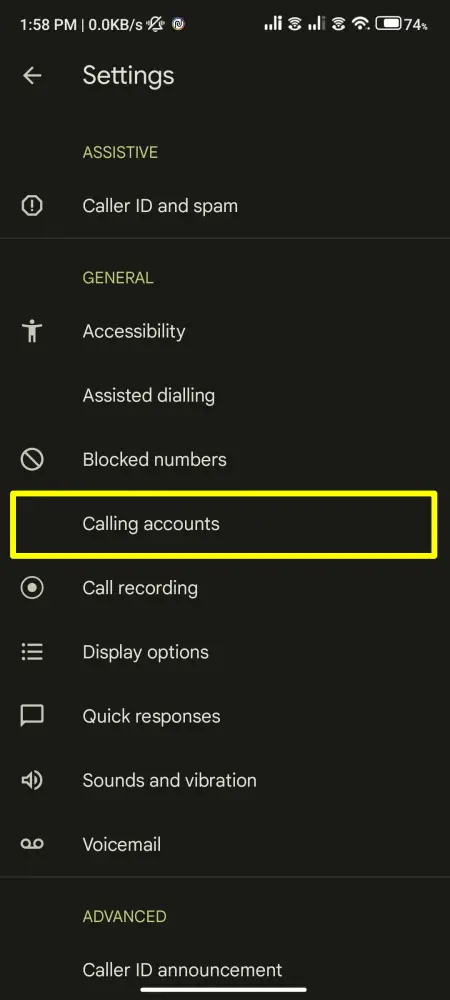
2. Then, tap on Calls/Calling accounts.
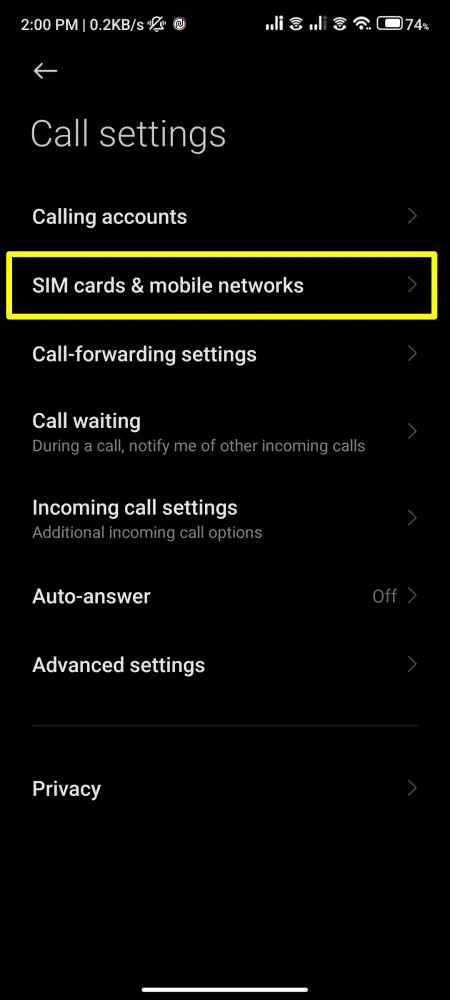
3. After that, tap on SIM cards & mobile networks and then select the SIM card on which you want to enable the wifi calling.
4. Then, scroll down and turn on the switch next to “Make Calls using WiFi”.
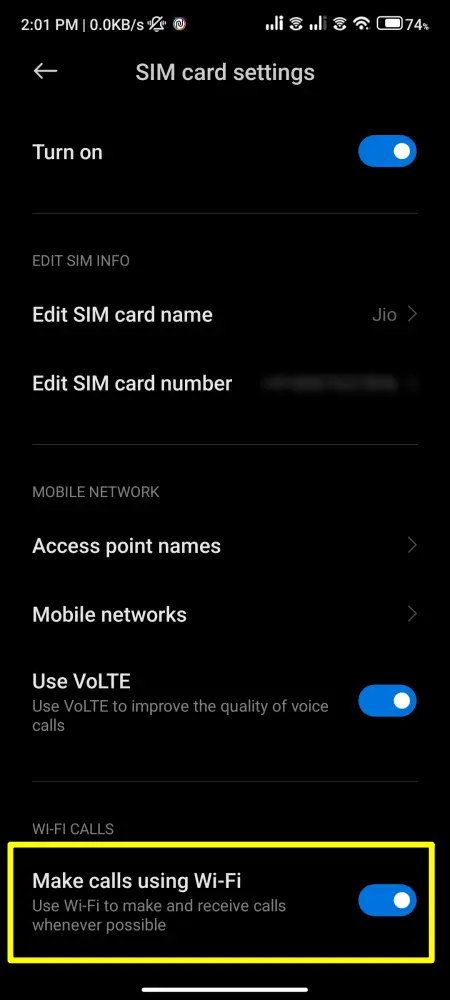
That’s it. Now you can make calls using your wifi network.
How to Enable WiFi Calling on Samsung Devices
If you are using a Samsung device, then the steps to enable WiFi calling are slightly different as Samsung does not use the Google Phone dialer, instead, it uses its own native dialer.
So, to enable Wi-Fi calling on your Samsung device, follow these steps.
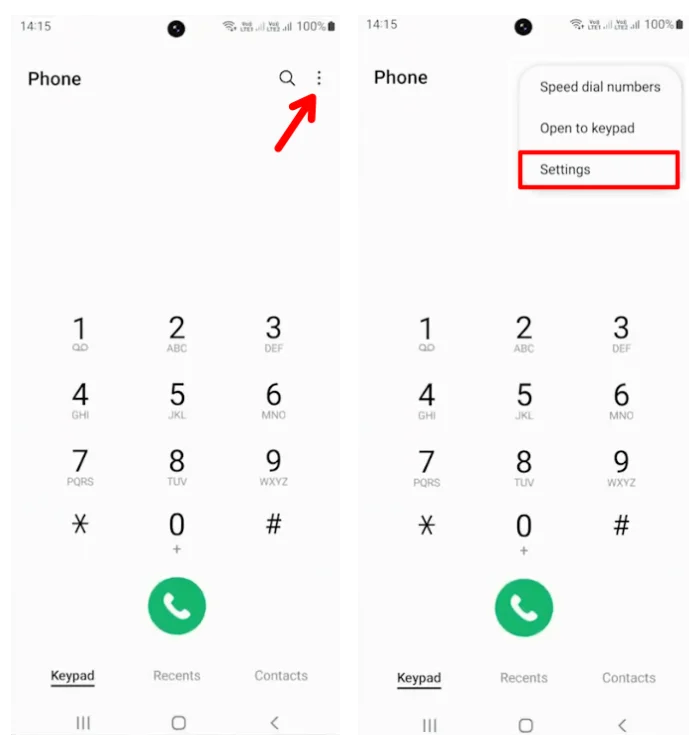
1. First, open the default Phone app on your Samsung device and tap on the three dots at the top right. Then, select “Settings”.
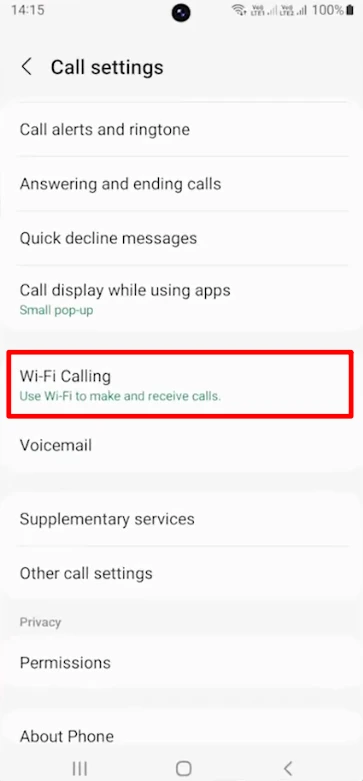
2. Next, scroll down and tap on “Wifi Calling”.
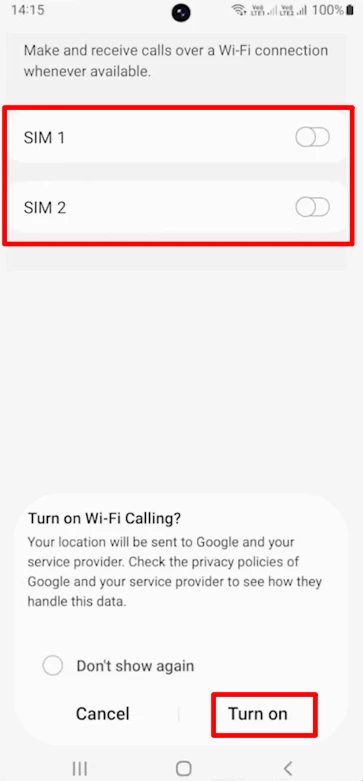
3. After that, toggle on the switch next to your sim card on which you want to enable wifi calling. Then confirm your choice, by tapping on the “Turn on” button.
That’s it. Now you can make calls using your wifi network.
How to Use WiFi Calling
Now, once you have successfully enabled WiFi calling on your Android phone, it’s time to learn how to make and receive calls over WiFi.
Using WiFi Calling is very easy, just look for the WiFi icon next to your carrier name in the status bar. If you see the “WiFi” icon, it means you’re using WiFi Calling.
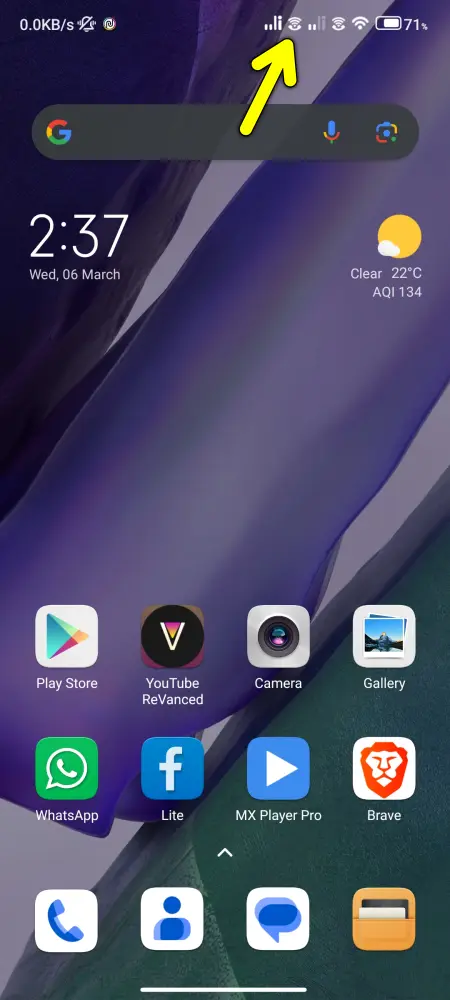
Now make any call and you will notice that the call will be made through WiFi. However, if the wifi connection is lost during the call, your call will be automatically switched to your cellular network.
Set Wi-Fi Calling as Your Preferred Option (Optional, But Recommended)
By default, your phone may only use Wi-Fi Calling when the cellular signal is weak. But, If you want always to use it when connected to Wi-Fi, do this:
- Go to Wi-Fi Calling settings.
- Tap Wi-Fi Calling Preferences.
- Select “Wi-Fi Preferred” instead of “Cellular Preferred.”
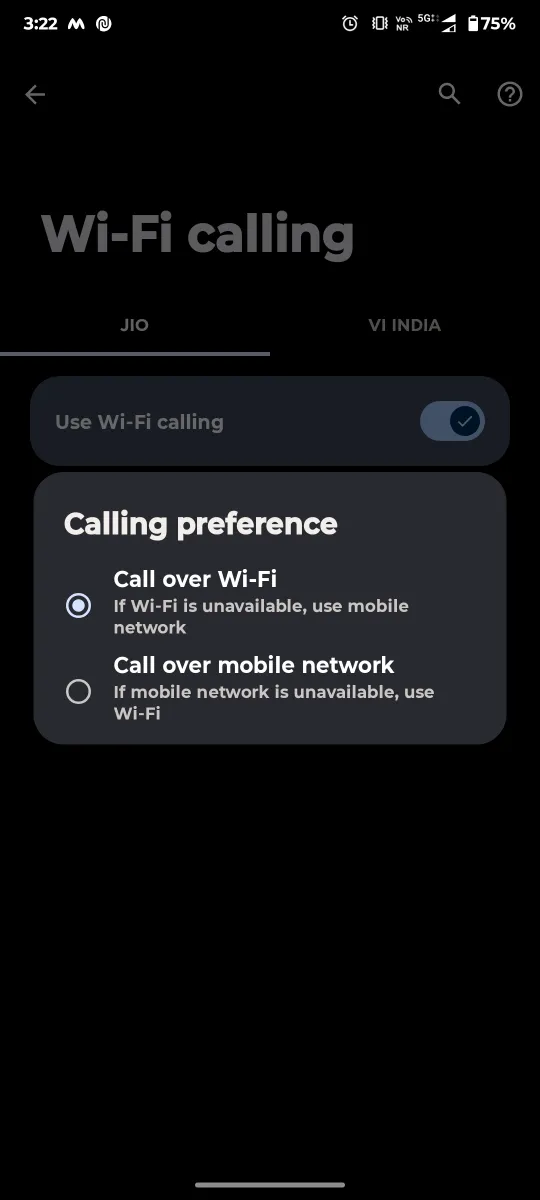
Your calls should now automatically switch to using Wi-Fi, reducing battery drain and also giving better audio quality.
Conclusion
Wi-Fi calling is a pretty handy feature if you live or work in an area with really poor mobile connections. Enabling it on your Android phone is simple, and it ensures you stay connected even when your carrier’s signal is weak. You can activate Wi-Fi calling on your Android device through the steps provided above and enjoy clear calls over Wi-Fi.
FAQs
1. Is Wi-Fi Calling free?
Yes, It’s usually free, but there may still be a fee for international calls, you can contact your carrier for details.
2. Does Wi-Fi Calling work without a SIM card?
No, you still need an active SIM card to use Wi-Fi Calling on your device.
Recommended Articles
How to Stop Flash Messages on Android (Jio, Airtel, Vi & BSNL)
How To Fix “Google Play Store Download Pending” Error
How to Recover Forgotten Wi-Fi Password Safely