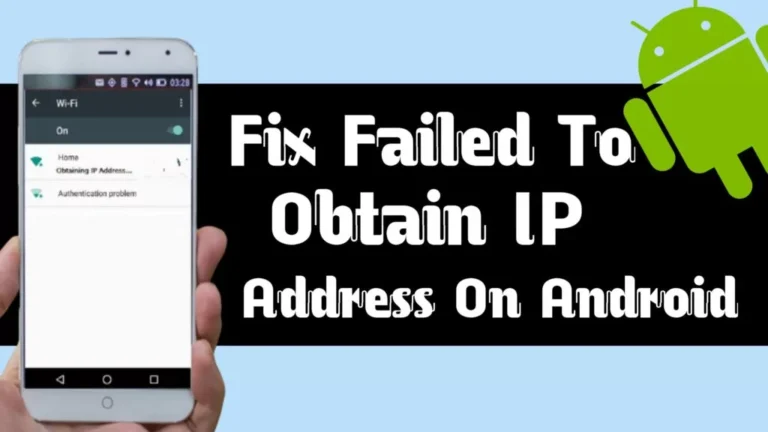
Have you ever been stuck staring at your phone, frustrated because it just won’t connect to Wi-Fi? If you’ve seen this message “Failed to Obtain IP Address” error, you’re not alone.
I’ve faced this issue multiple times, especially during those moments when I desperately needed to send an email or stream my favourite show.
So, after several days of reading, researching, and testing it on myself, I have found the working solutions. So, I have added the solutions to this article.
Also, Read Best Techniques On How To Increase Internet Speed
What Does This Error Mean?
This error pops up when your Android phone tries to connect to a Wi-Fi network or Hotspot but fails to get a valid IP address from the router. It’s like your phone is asking the router, “Hey, where’s my seat at the table?” but doesn’t get a proper response. Without an IP address, your phone can’t access the internet.
Why Does This Happen?
Here are some common reasons for this error:
- Router issues – The router might be overloaded or misconfigured.
- Device glitches – Temporary bugs on your Android can cause the problem.
- IP address conflicts – Two devices trying to use the same IP address can lead to trouble.
- Weak signal – Poor Wi-Fi signals can disrupt the connection process.
7 Ways To Solve “Failed To Obtain IP Address” Error On Android
It’s difficult to tell accurately why this occurs, but here are some methods to try and get your internet connection to work.
Method 1: Restart Your Wi-Fi and Phone
Sometimes, all it takes is a quick restart. Here’s what to do:
- Turn Wi-Fi off and back on: Go to Settings > Wi-Fi and toggle it off, wait 10 seconds, then turn it on.
- Restart your phone: Hold the power button and select “Restart.”
This simple fix works surprisingly often. It resolved my issue the first time I tried it.
Method 2: Using the Forget Network Method
If the restarting doesn’t work try the forget the network method and sign into it again. If the problem is due to a short interruption, this should help. The steps to use are simple and sometimes it will fix the “Failed To Obtain IP Address” error.
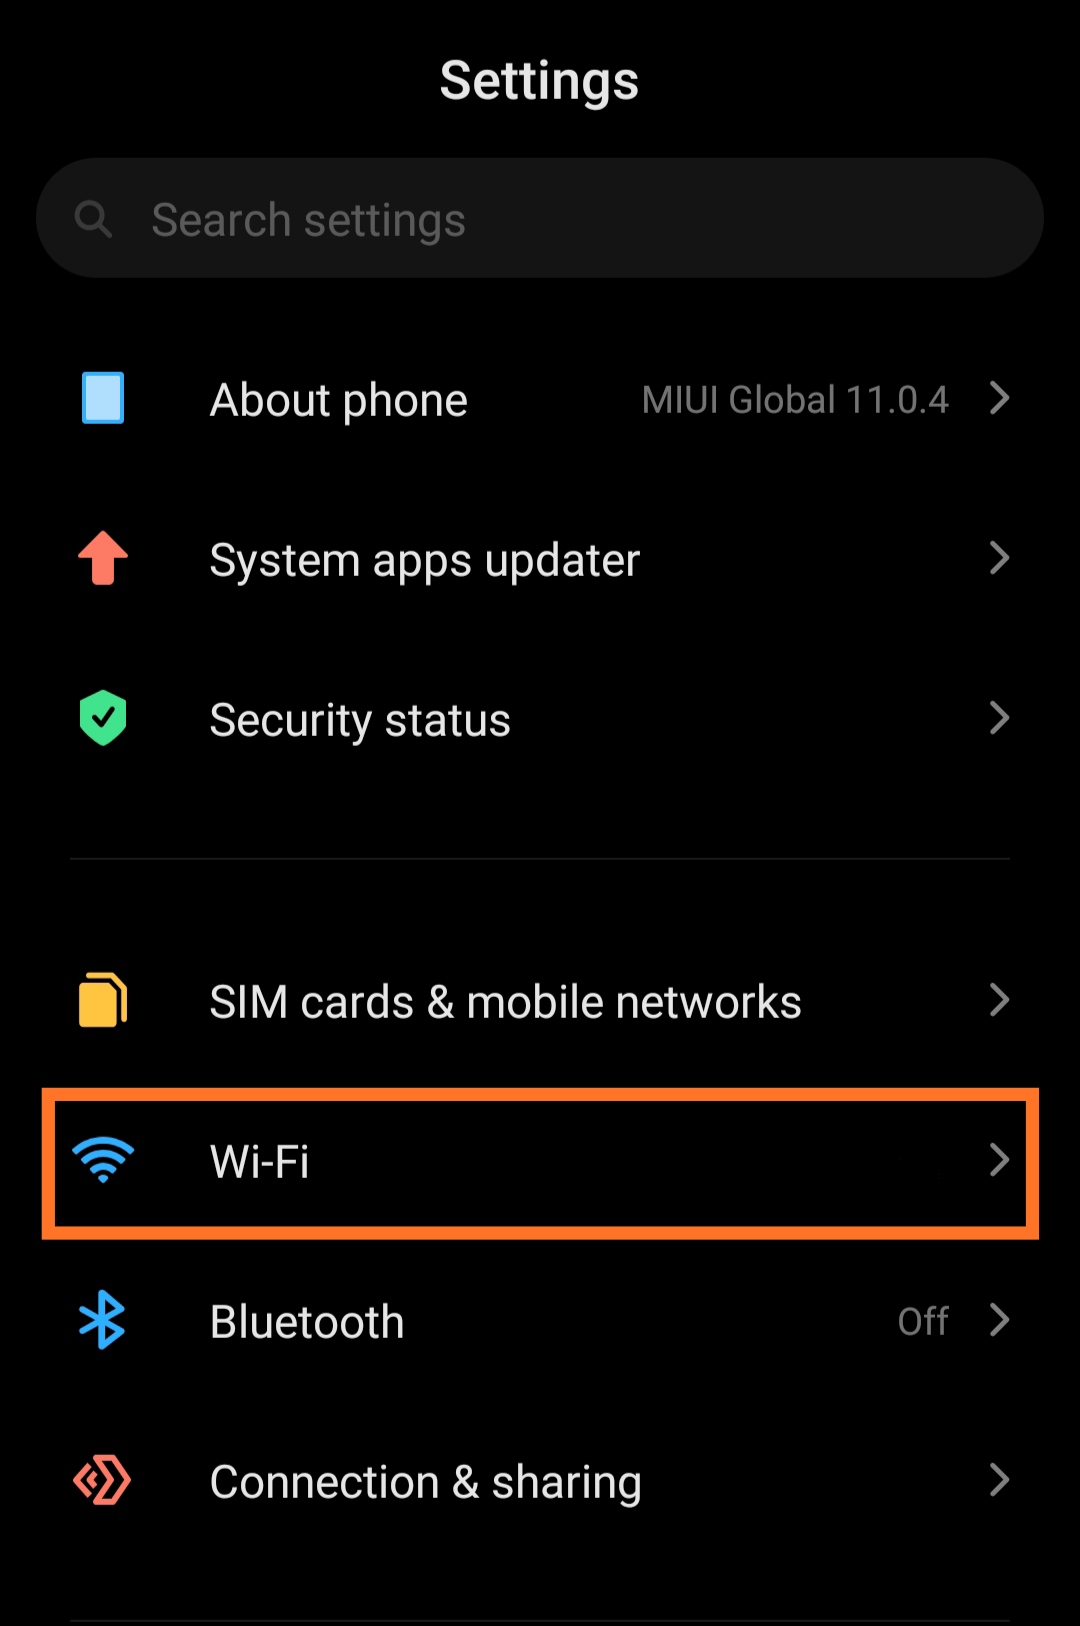
1. Open The Settings App And Select the Wi-Fi option.
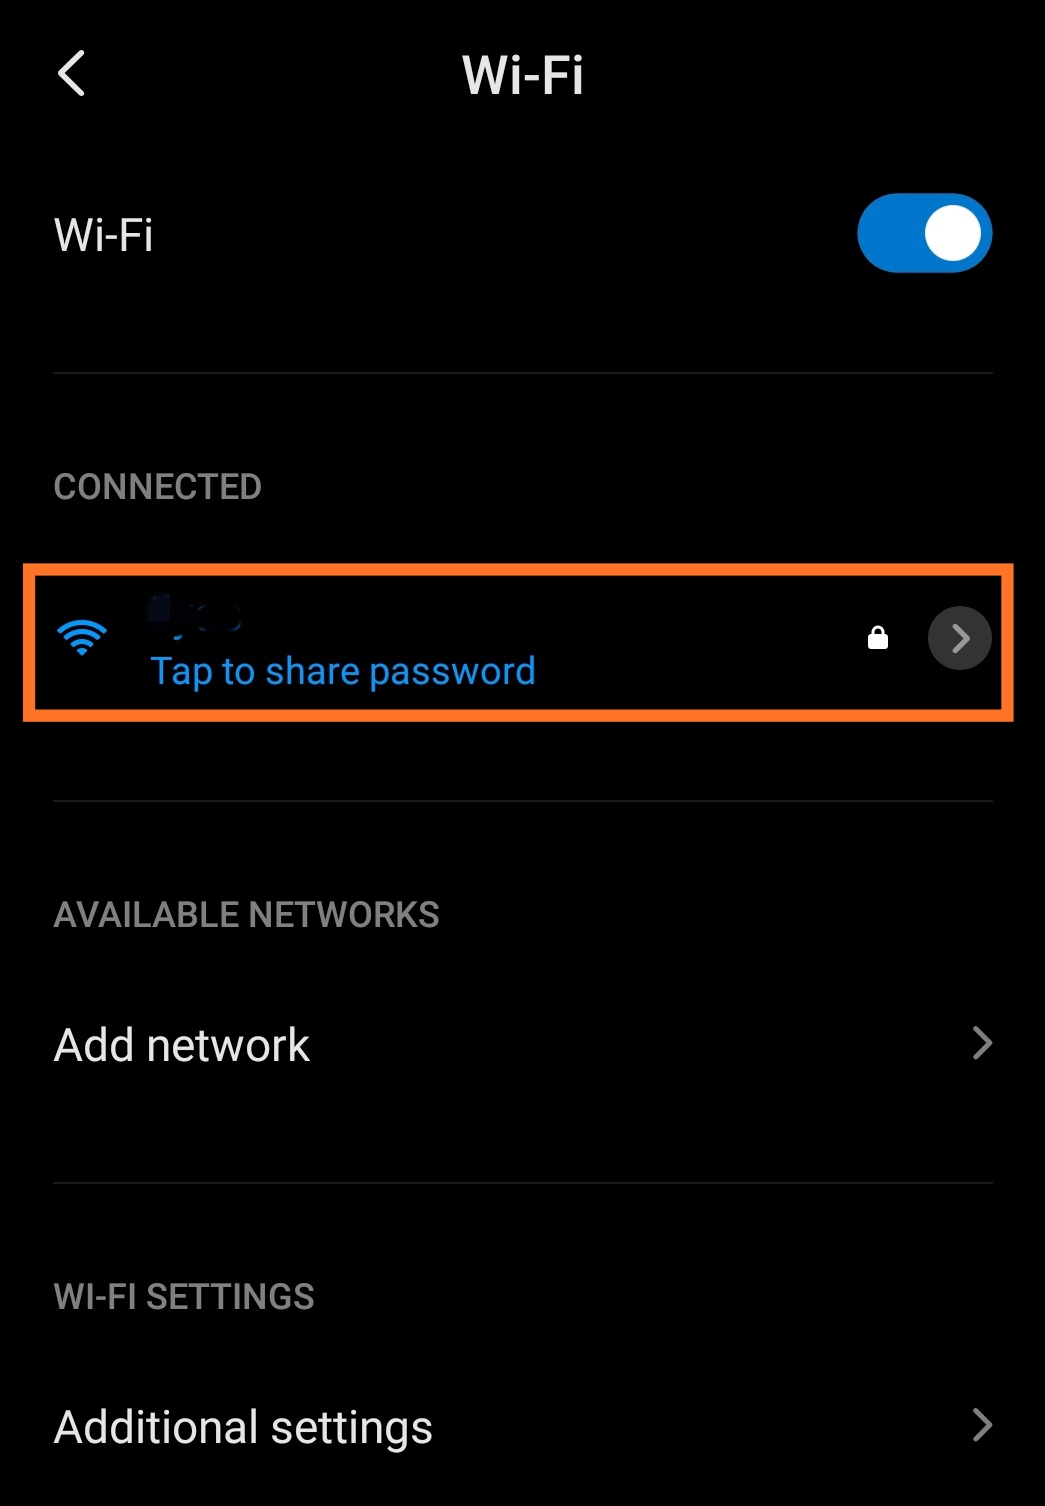
2. Select the network you can’t connect to
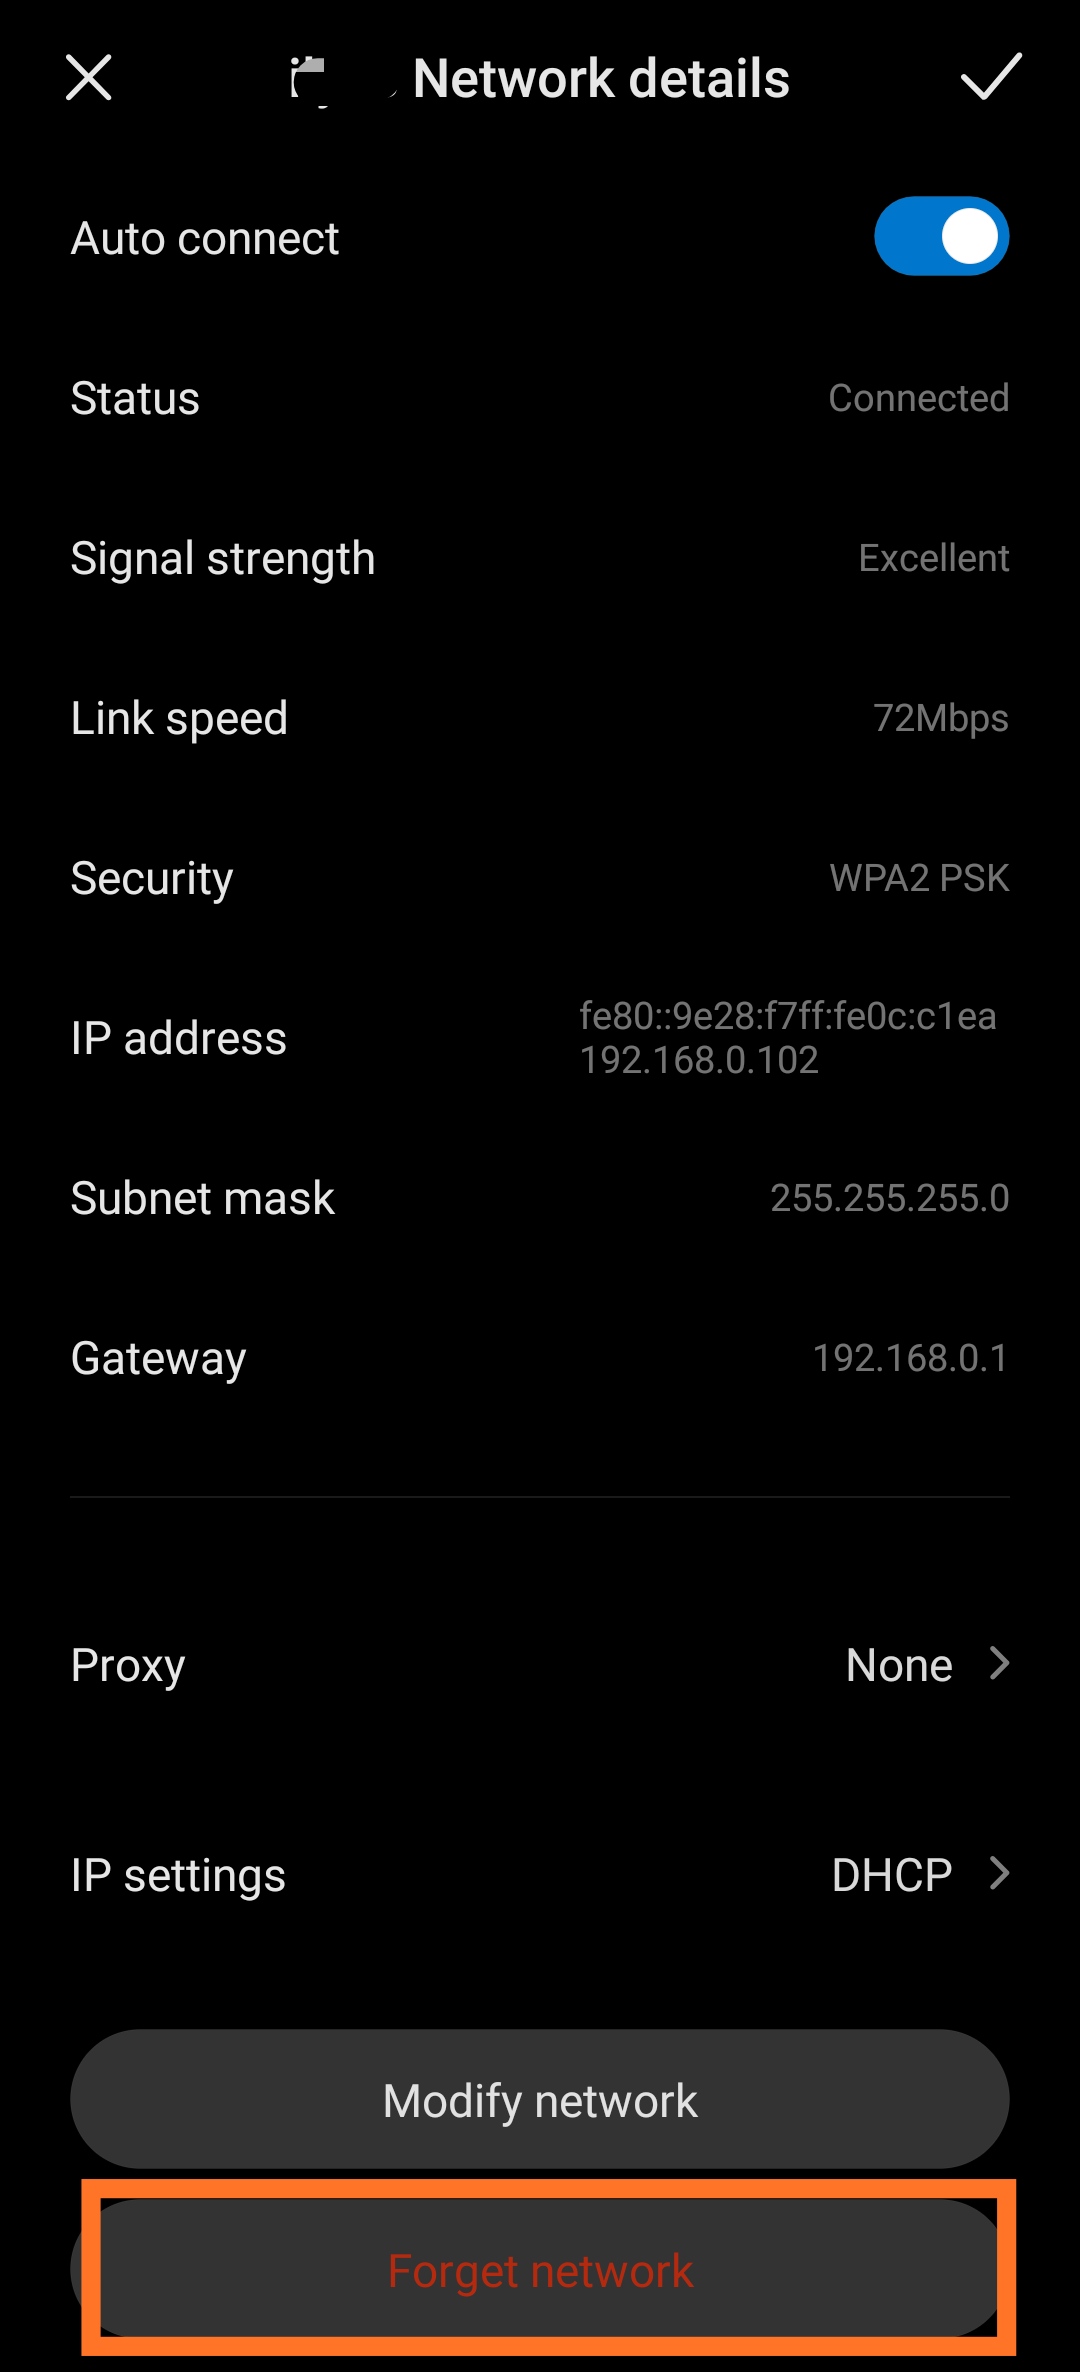
3. Now Click On Forget Network.
4. Enter The Password And Log into the Wi-Fi network again.
Also, Read Hack Any Android Device With Termux With Android
Method 2: Turn Airplane Mode On And Off
The Airplane mode restarts phone settings, so if the problem is some software interruptions or related, this method will help. This method works most of the time however it is a temporary way of fixing the issue
1. Just Go To Flight Mode Or Airplane Mode.
2. Enable Flight Mode Or Airplane Mode, Wait For 15 -20 sec.
3. Now Disable Flight Mode Or Airplane mode.
4. Now Again Connect To The Wifi And See if The problem Is Solve Or Not.
Method 3: Assign a static IP to your Android Device
This is not a complete solution. However, if you cannot solve the Obtaining IP Address error on your Android, you may use it as a temporary solution. Follow these steps to manually allocate a static IP to your smartphone or tablet.
1. Go to Settings and select the Wifi option. Turn on Wi-Fi and enter Wi-Fi settings.
2. Click on the network that Gives Failed To Obtain IP Address Error.
3. Select “Modify network.” And Look for “IP settings”.
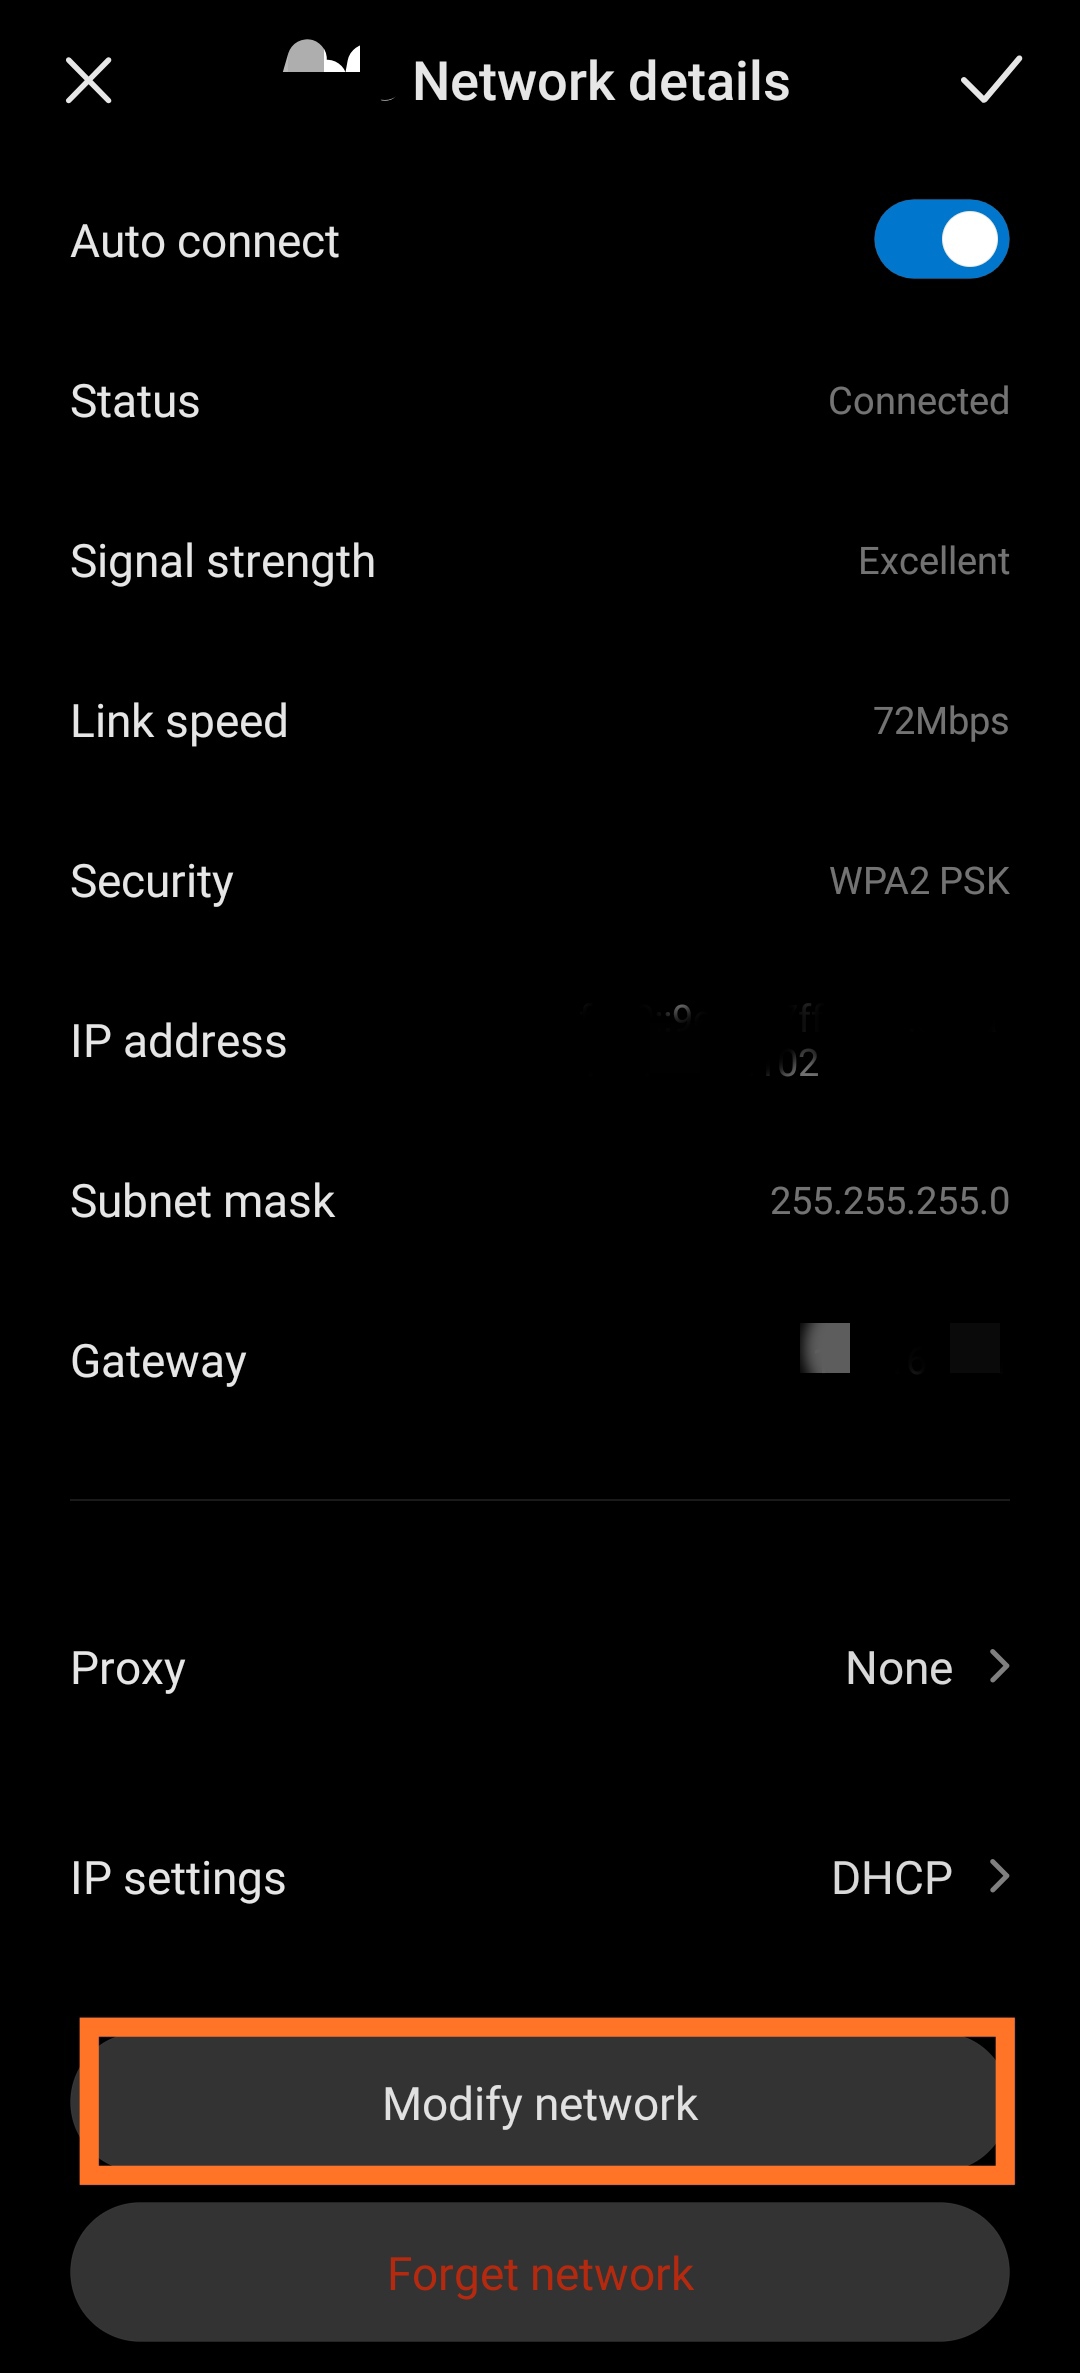
4. Next, in the IP setting, select “static”.
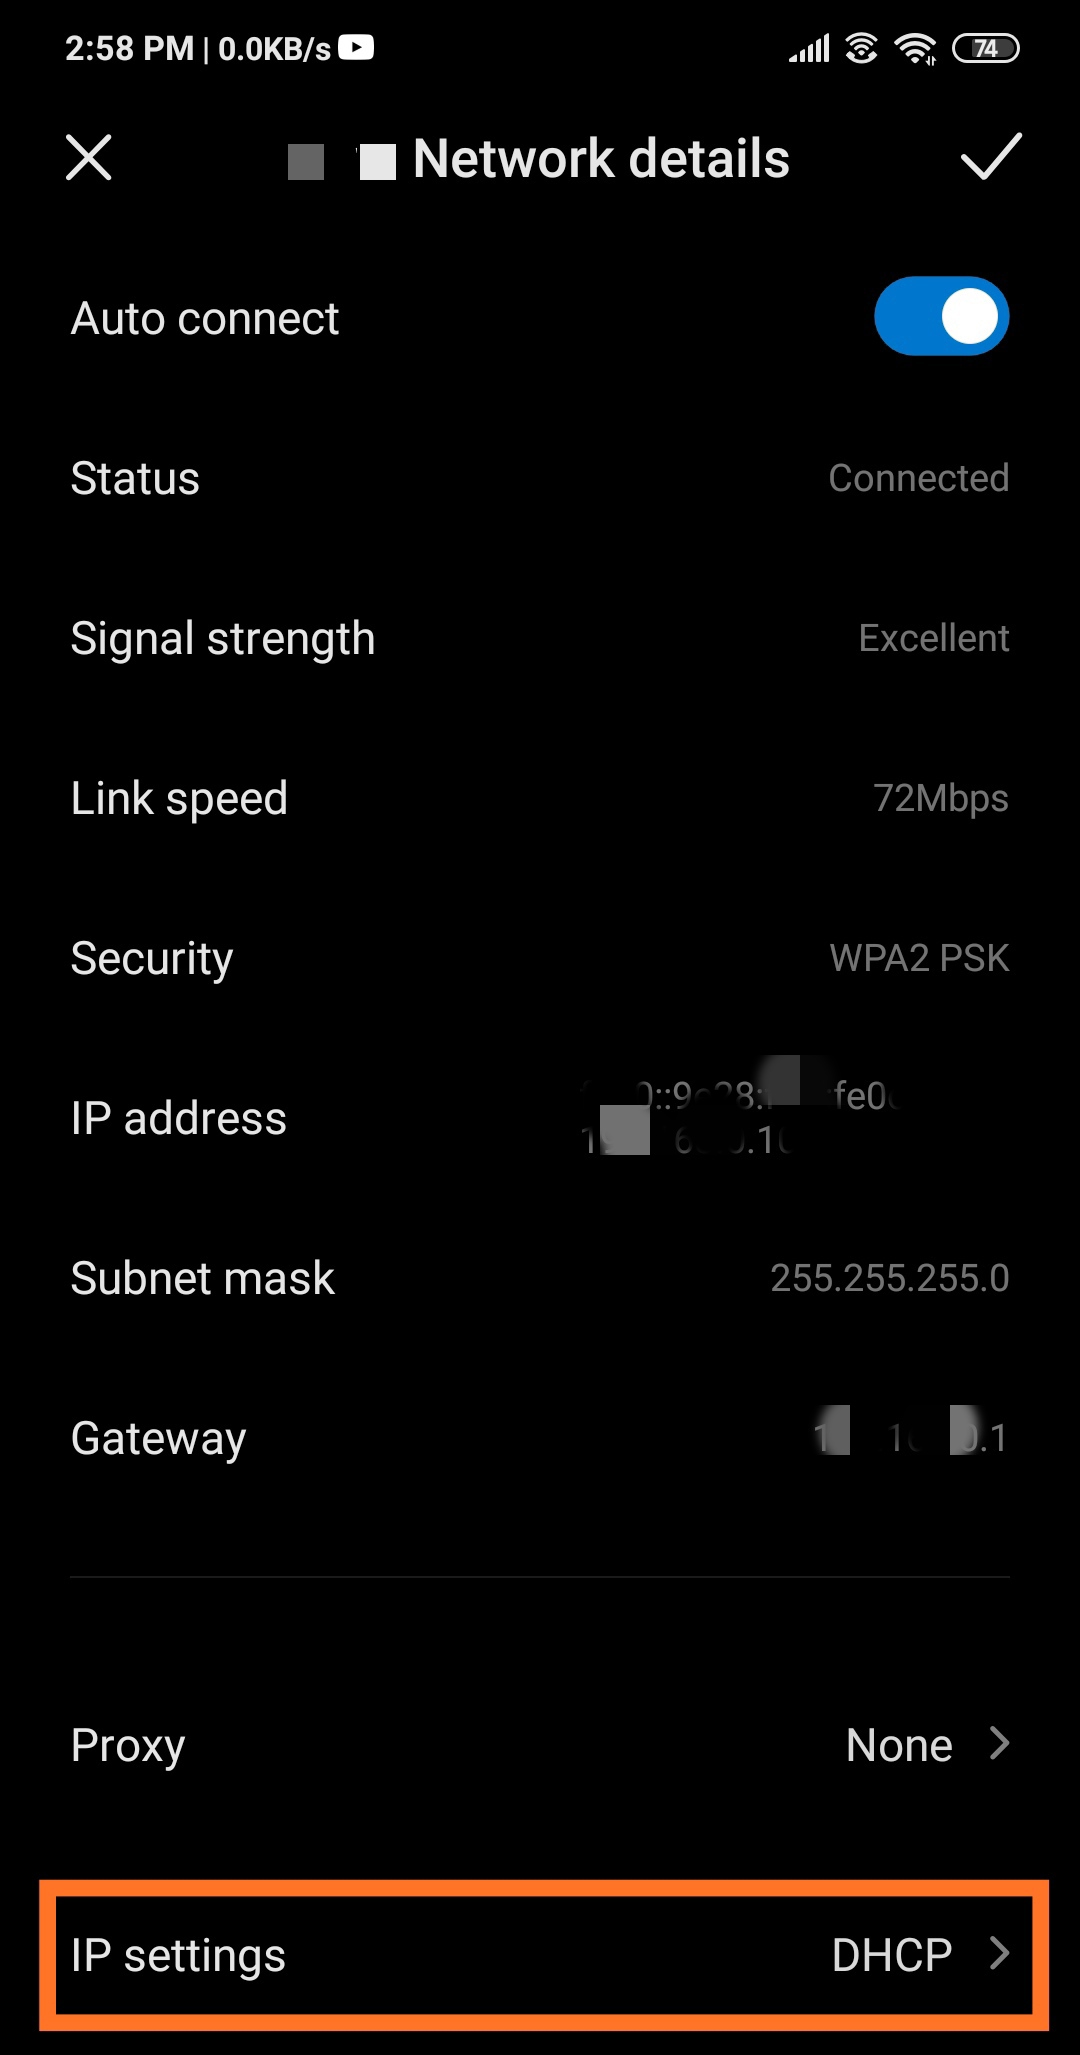
5. In the IP address, replace the last number with any number between 10 to 225
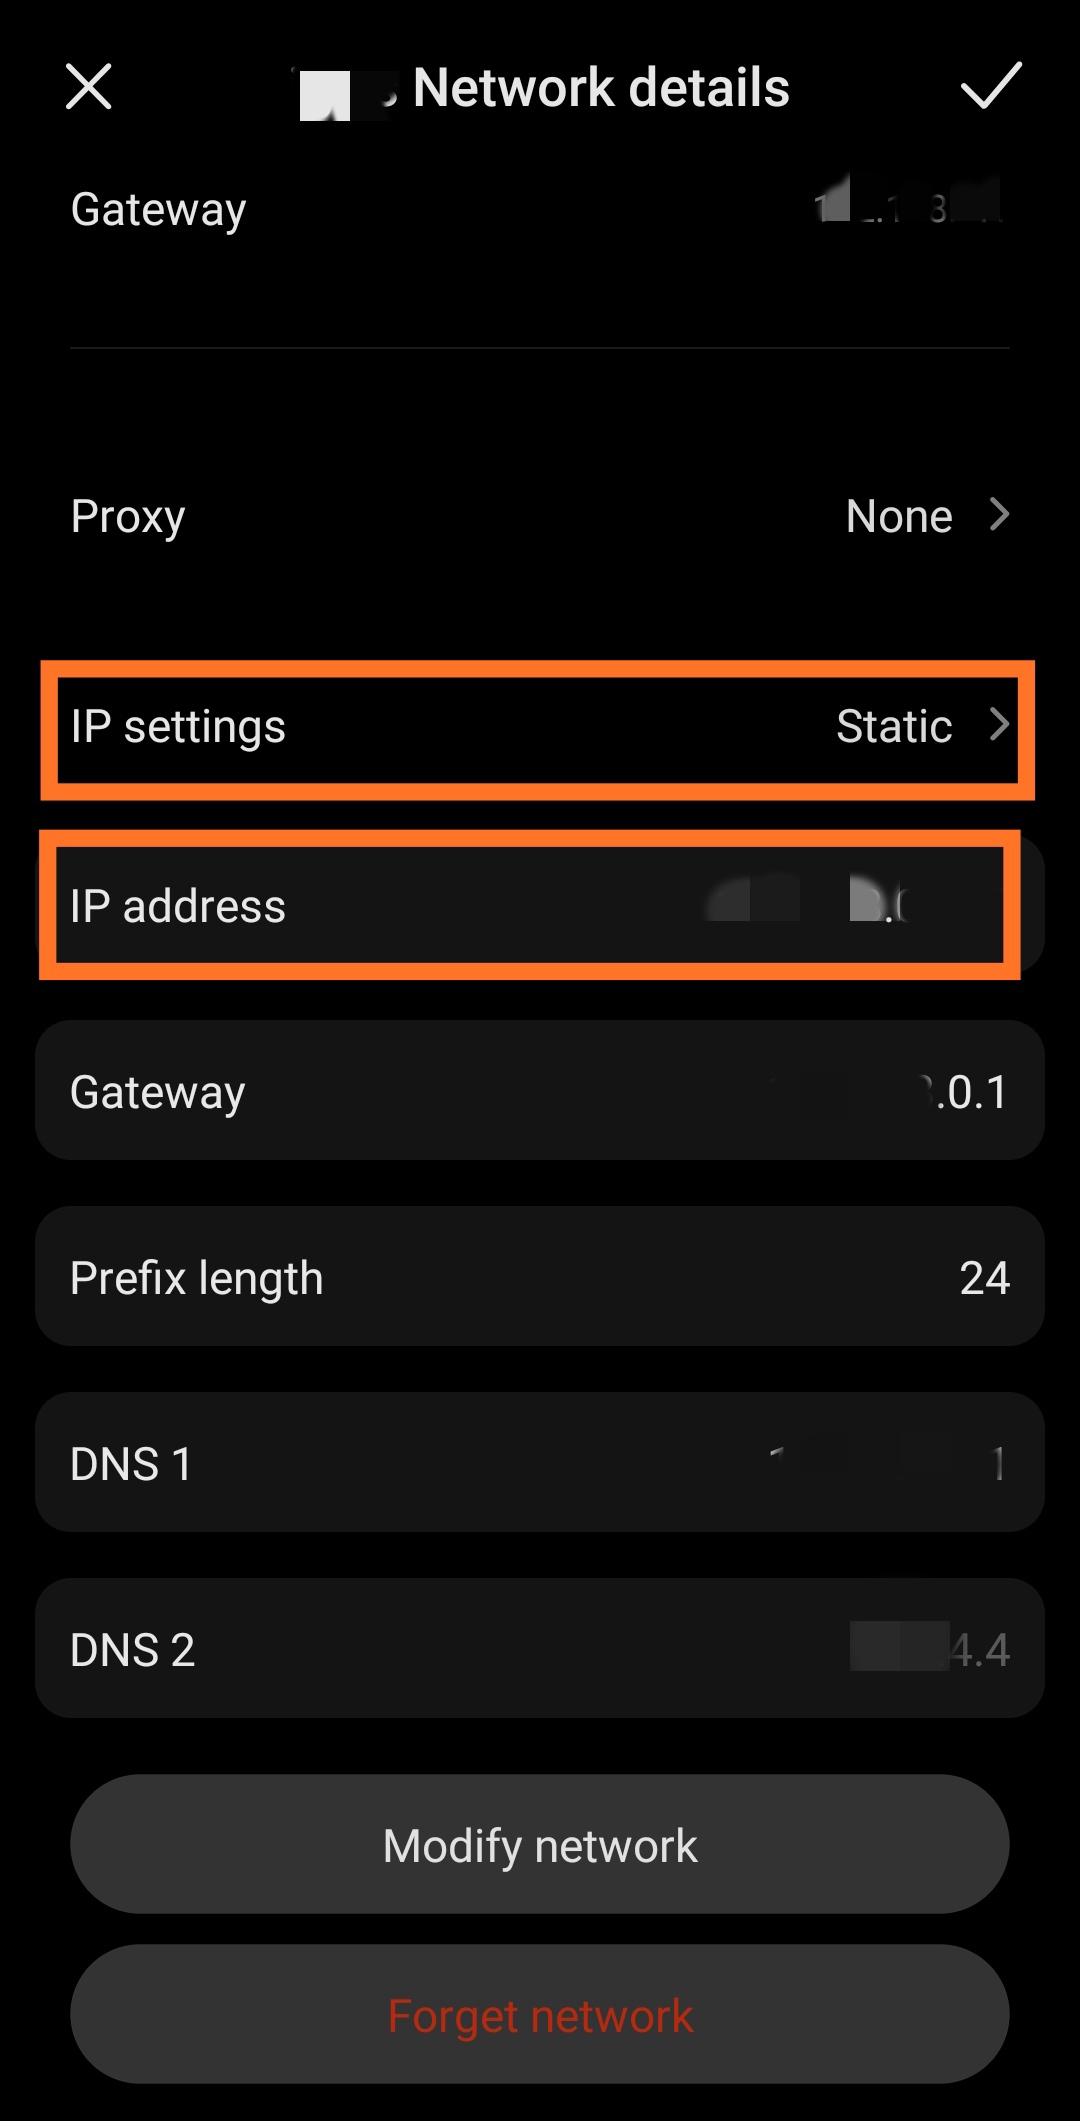
6. Then, Click on save.
This should solve the obtaining an IP address error. Make sure you choose a different IP address so that it won’t clash with other connected devices.
Also, Read How To Change Mac Address Of Your Android Devices & Windows
Method 4: Clear Google Play Services cache
This method is commonly found in almost every troubleshooting guide, mainly because it impacts numerous tasks on your phone.
Google Play Services is responsible for various features and functions on your Android device, making it one of the first methods to check when encountering issues. Luckily, the solution to this problem isn’t too complicated.
1. Open the Settings app And Select “Apps & notifications.”
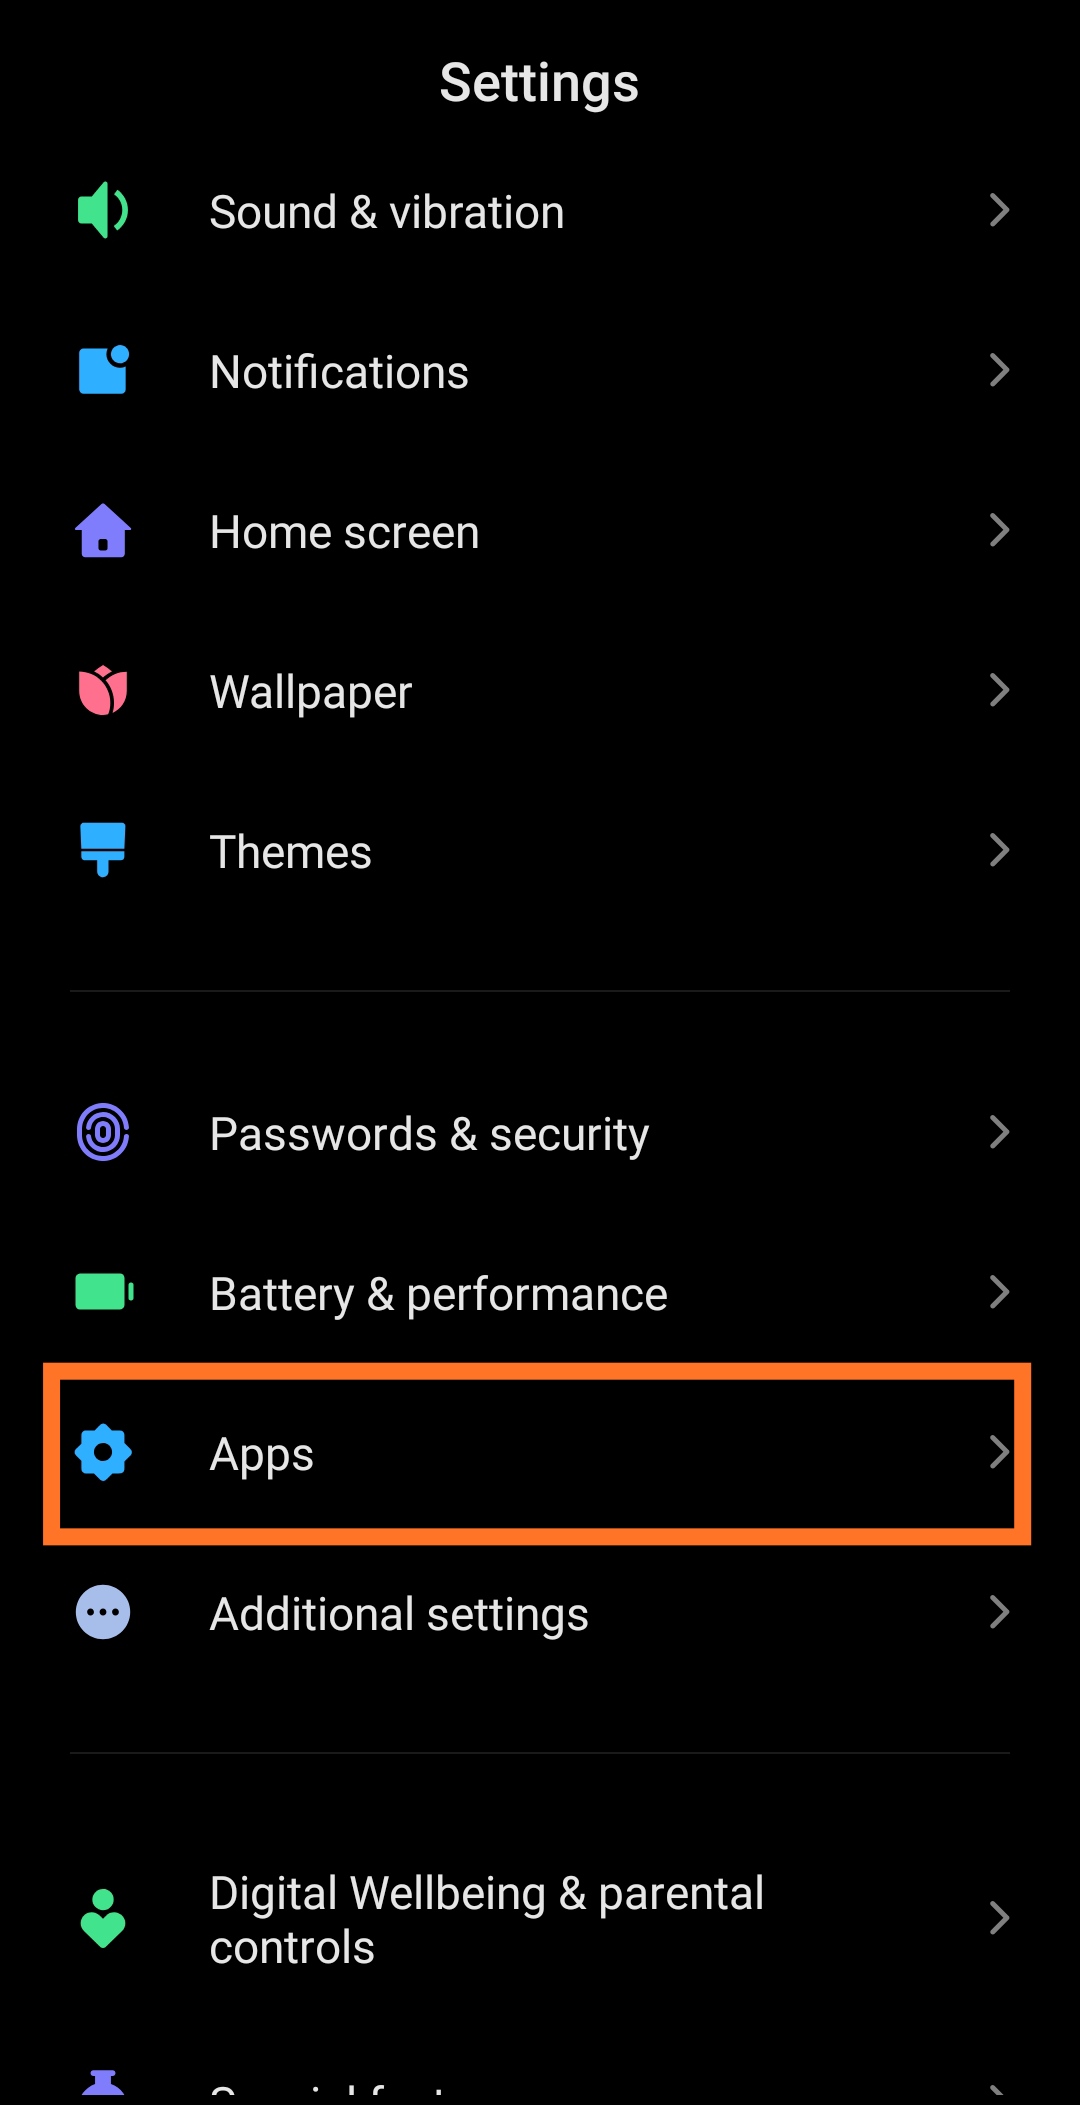
2. Then, Find and tap on “Google Play Services.”
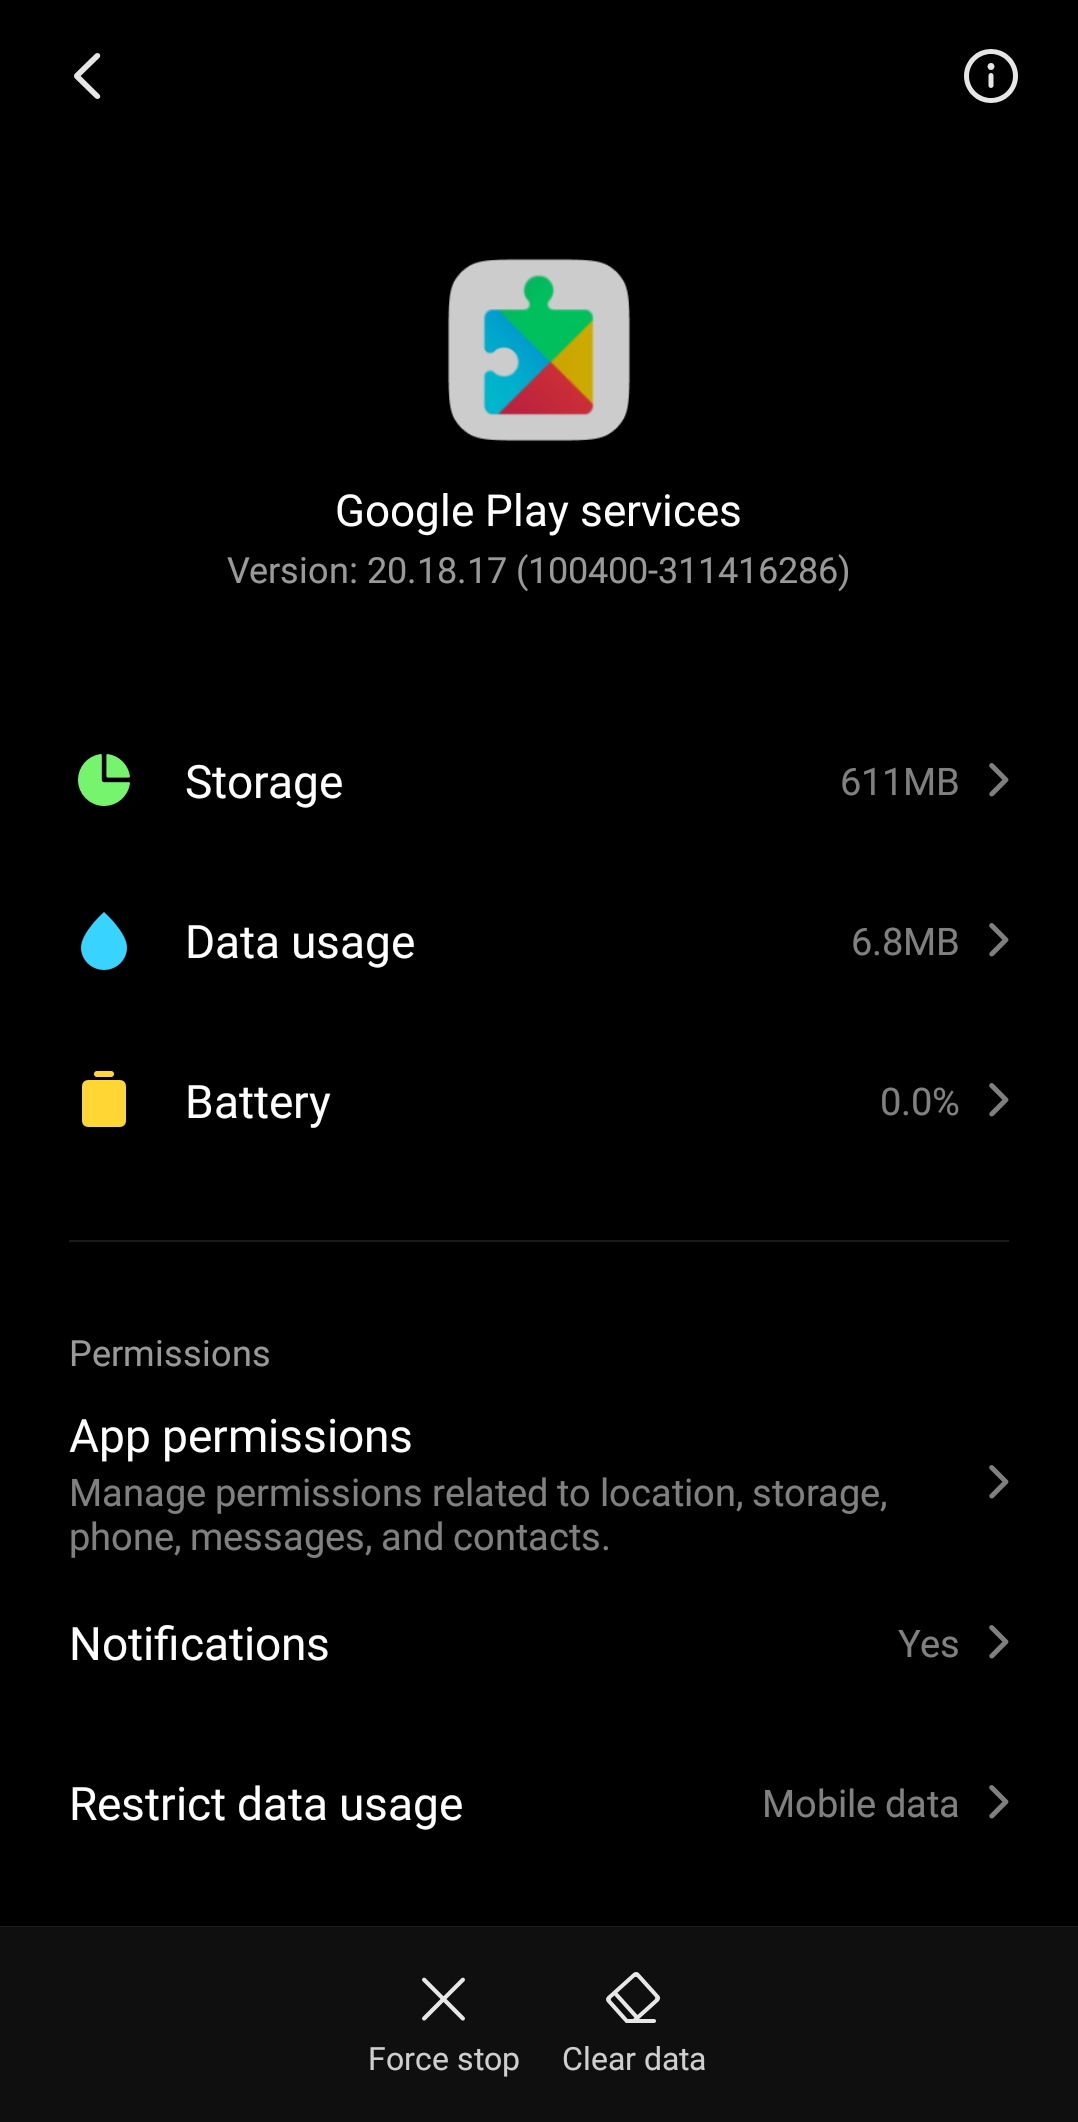
3. After that, Select Storage And click on Clear cache.
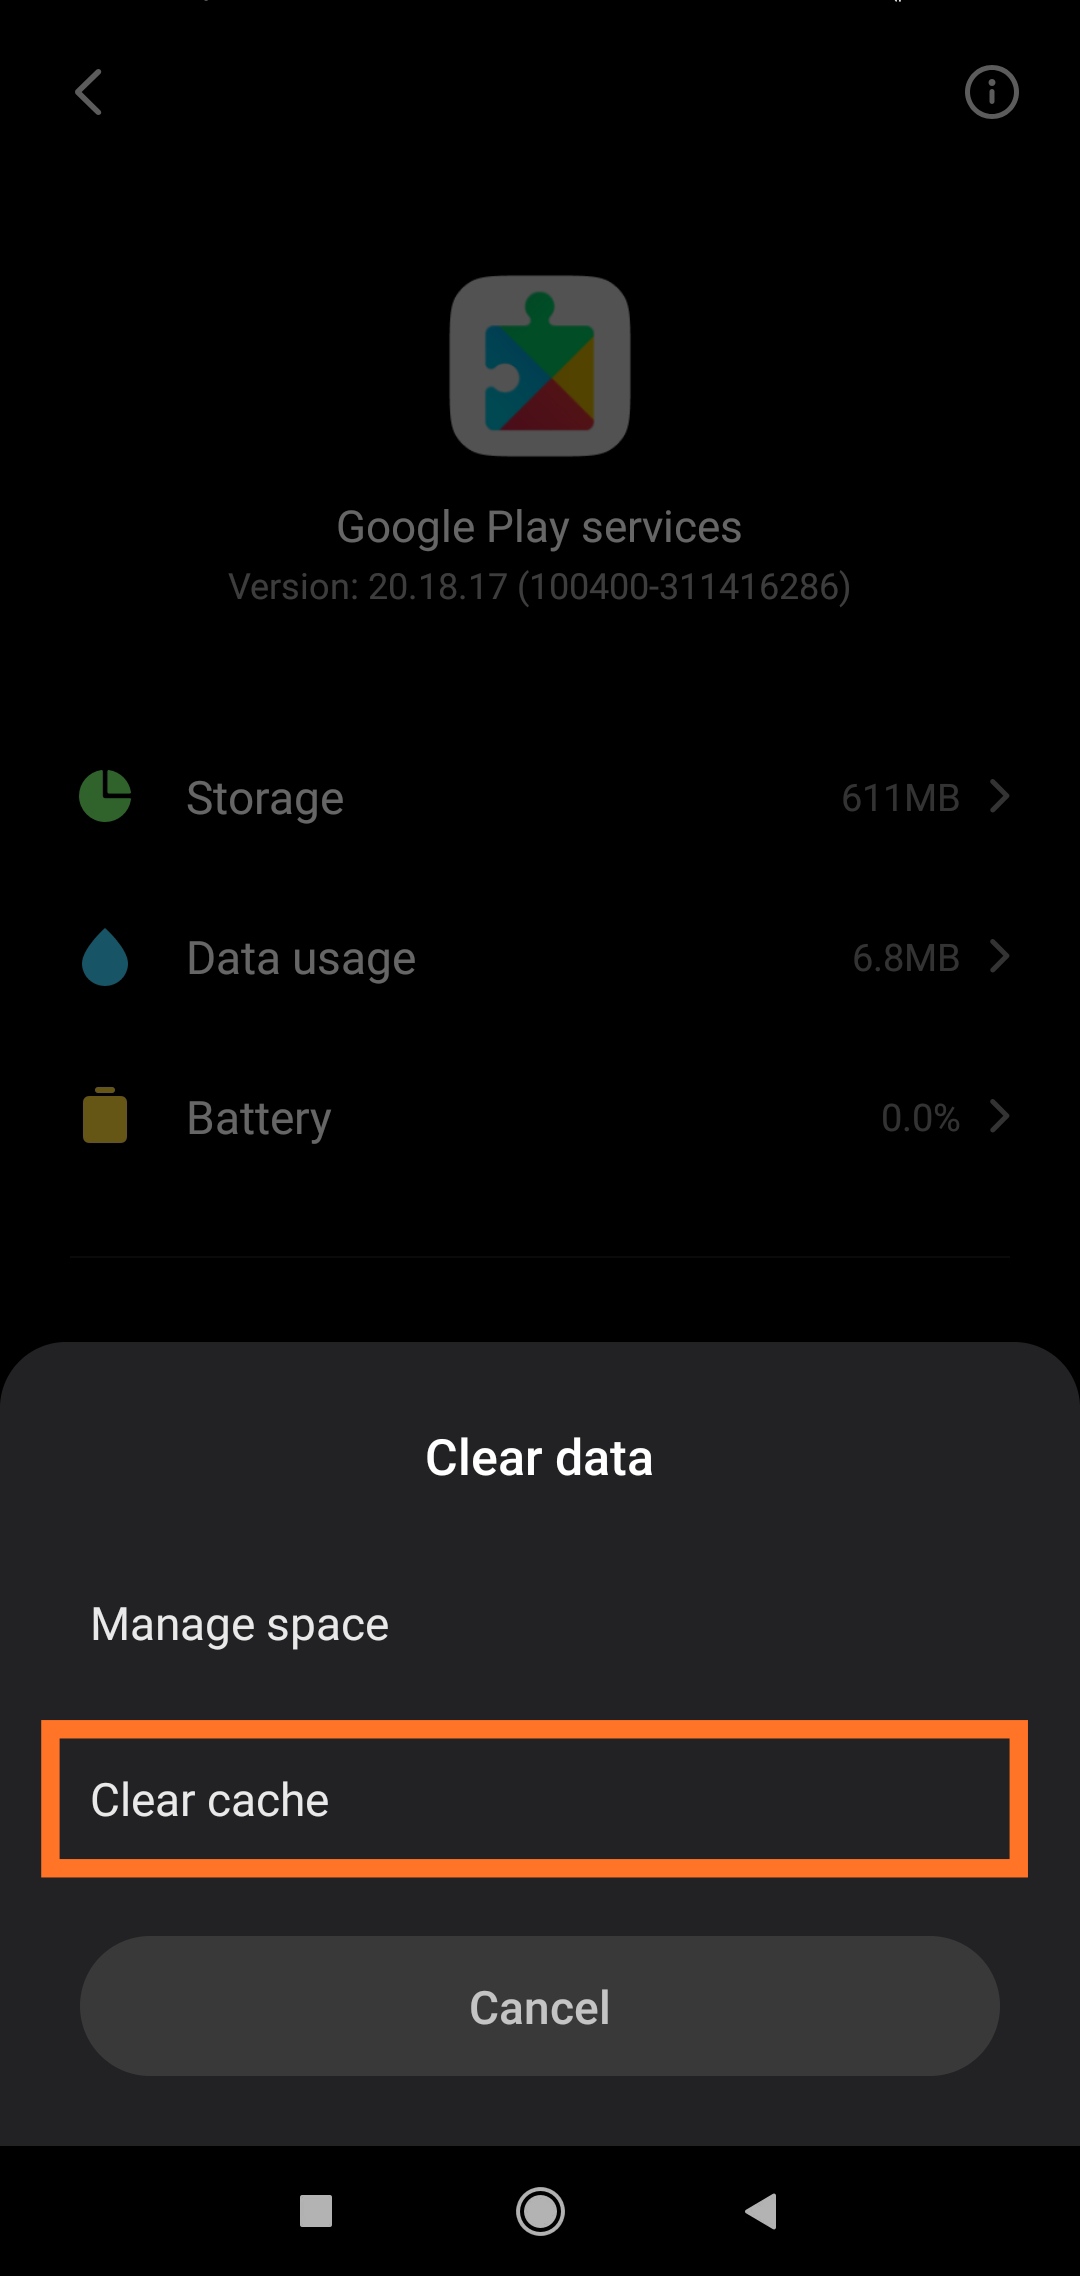
This will clear the cache, removing any caching errors that could’ve been Creating the Problem with the Wi-Fi functionality.
After this, simply use your Wi-Fi like you normally would, and it will probably be back to normal.
Method 5: Change Your Device’s Name
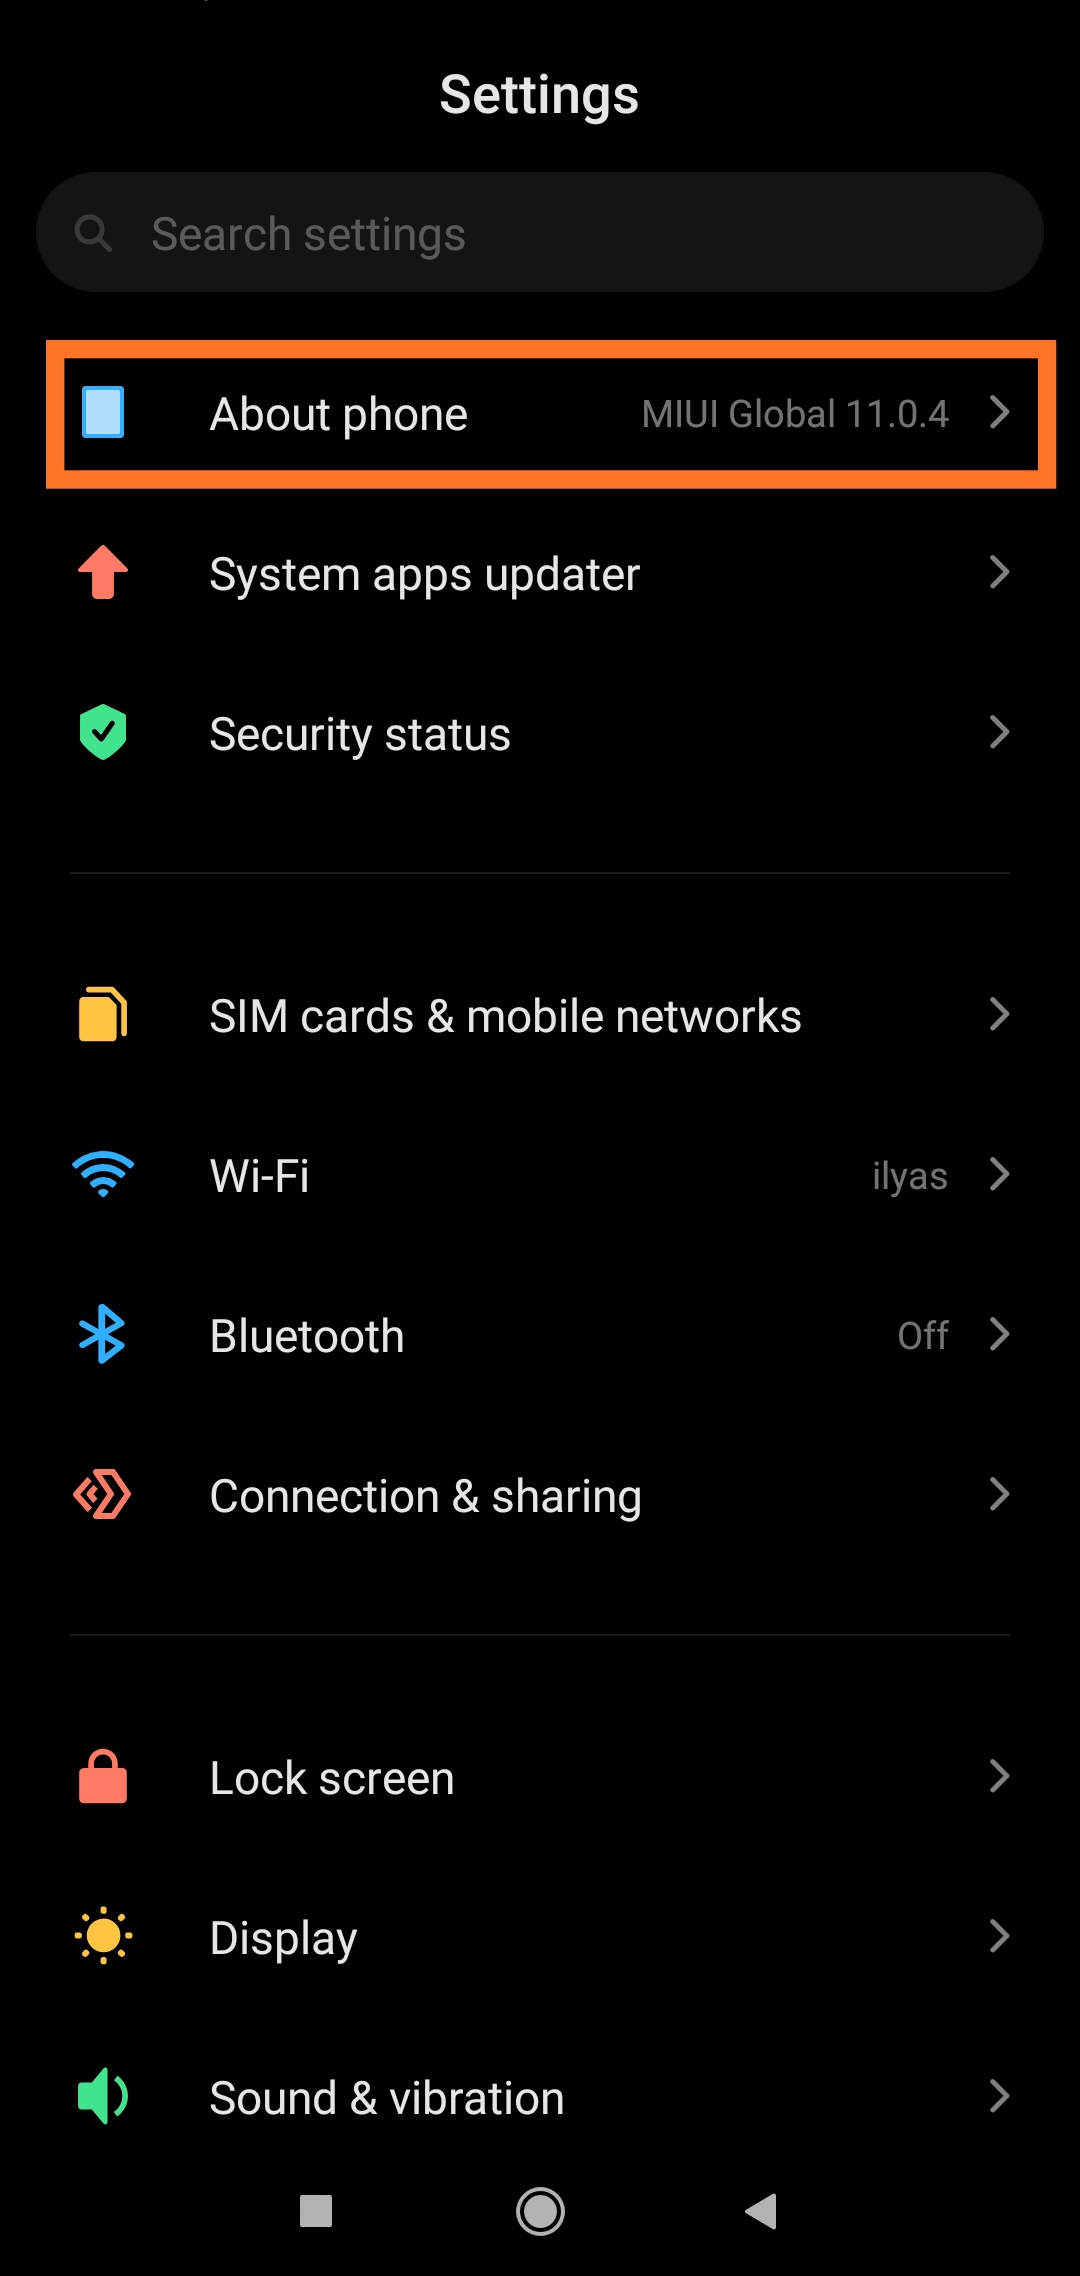
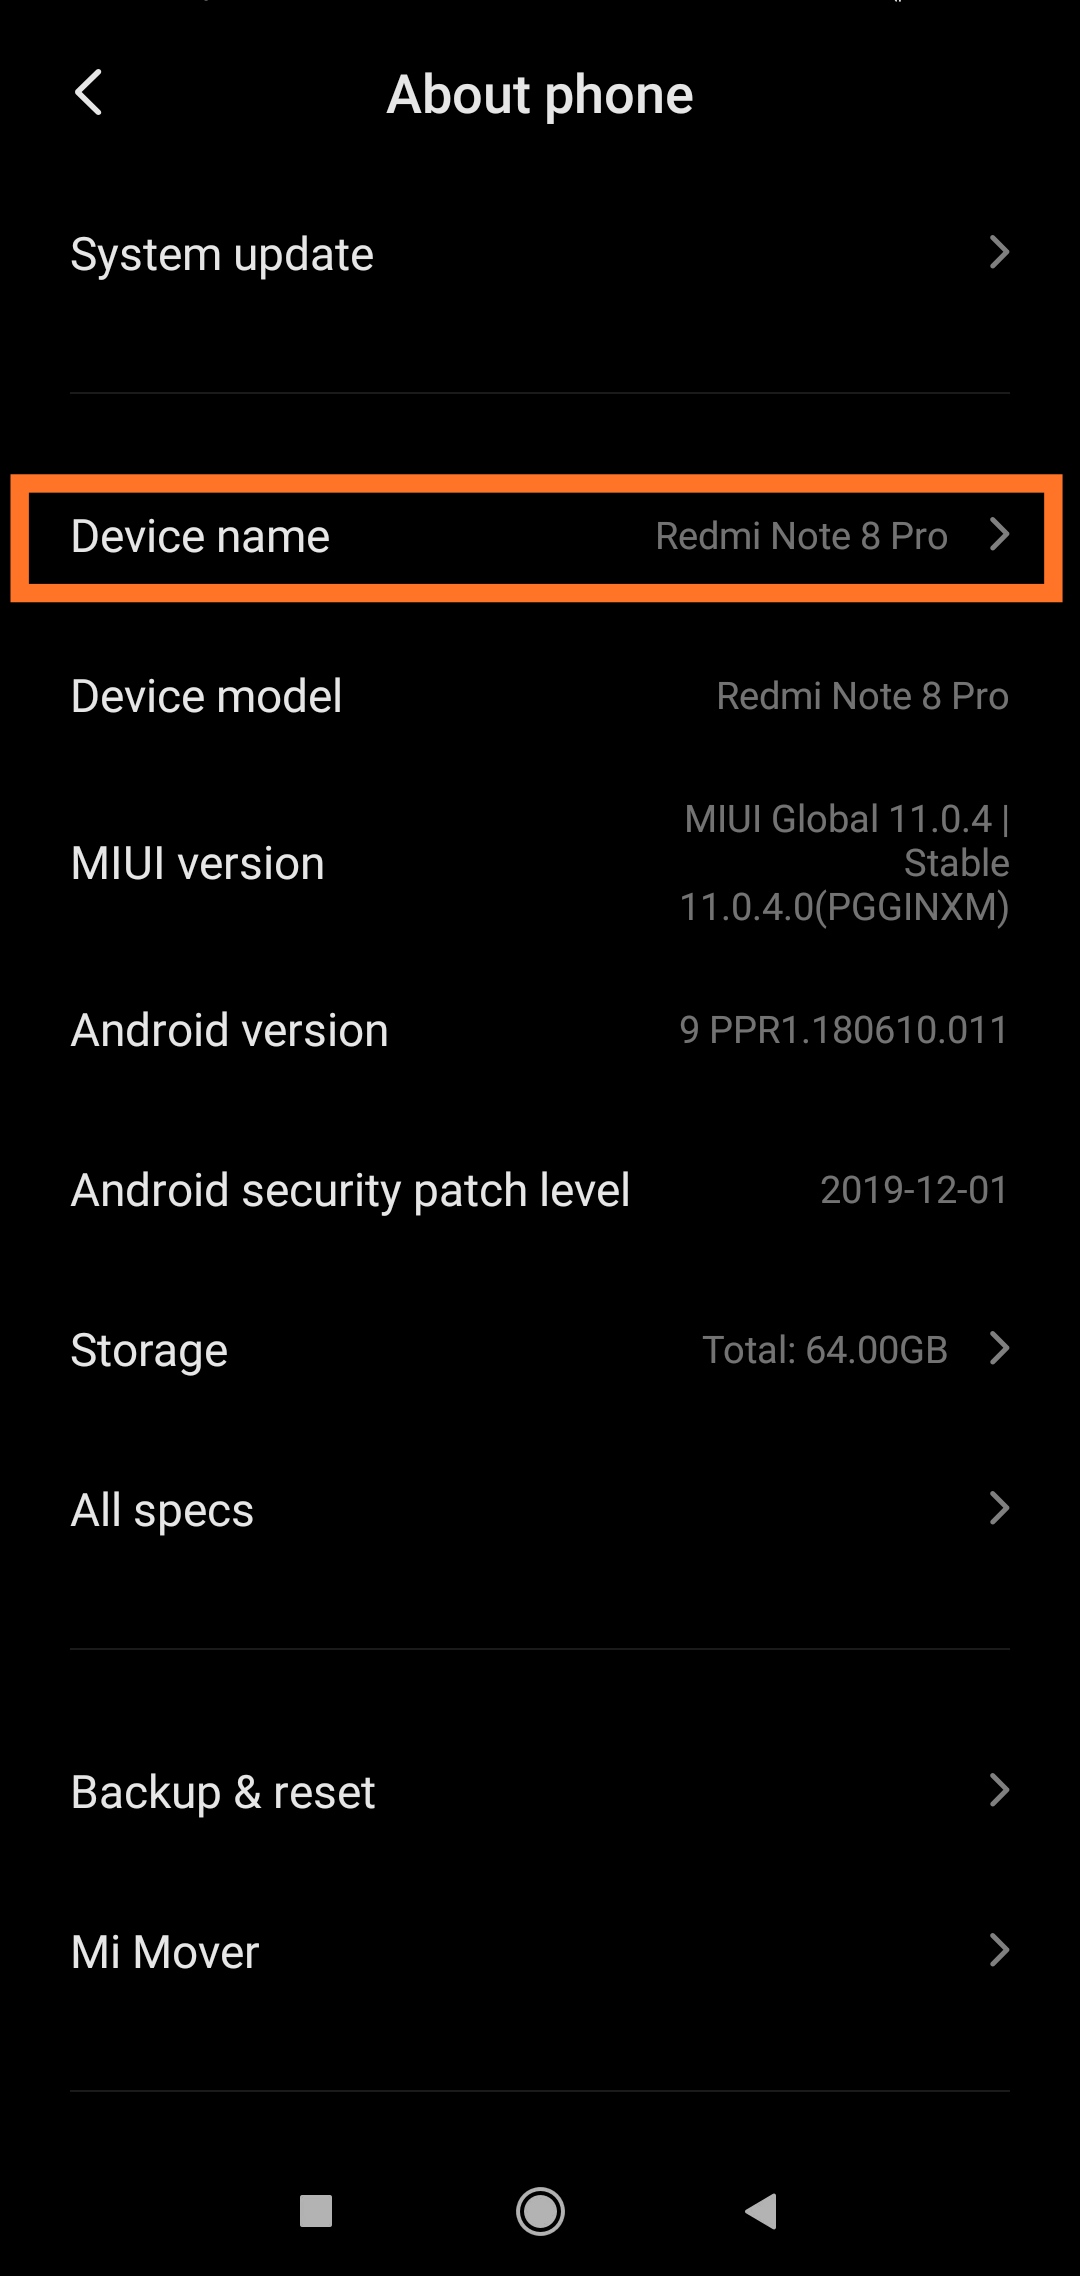
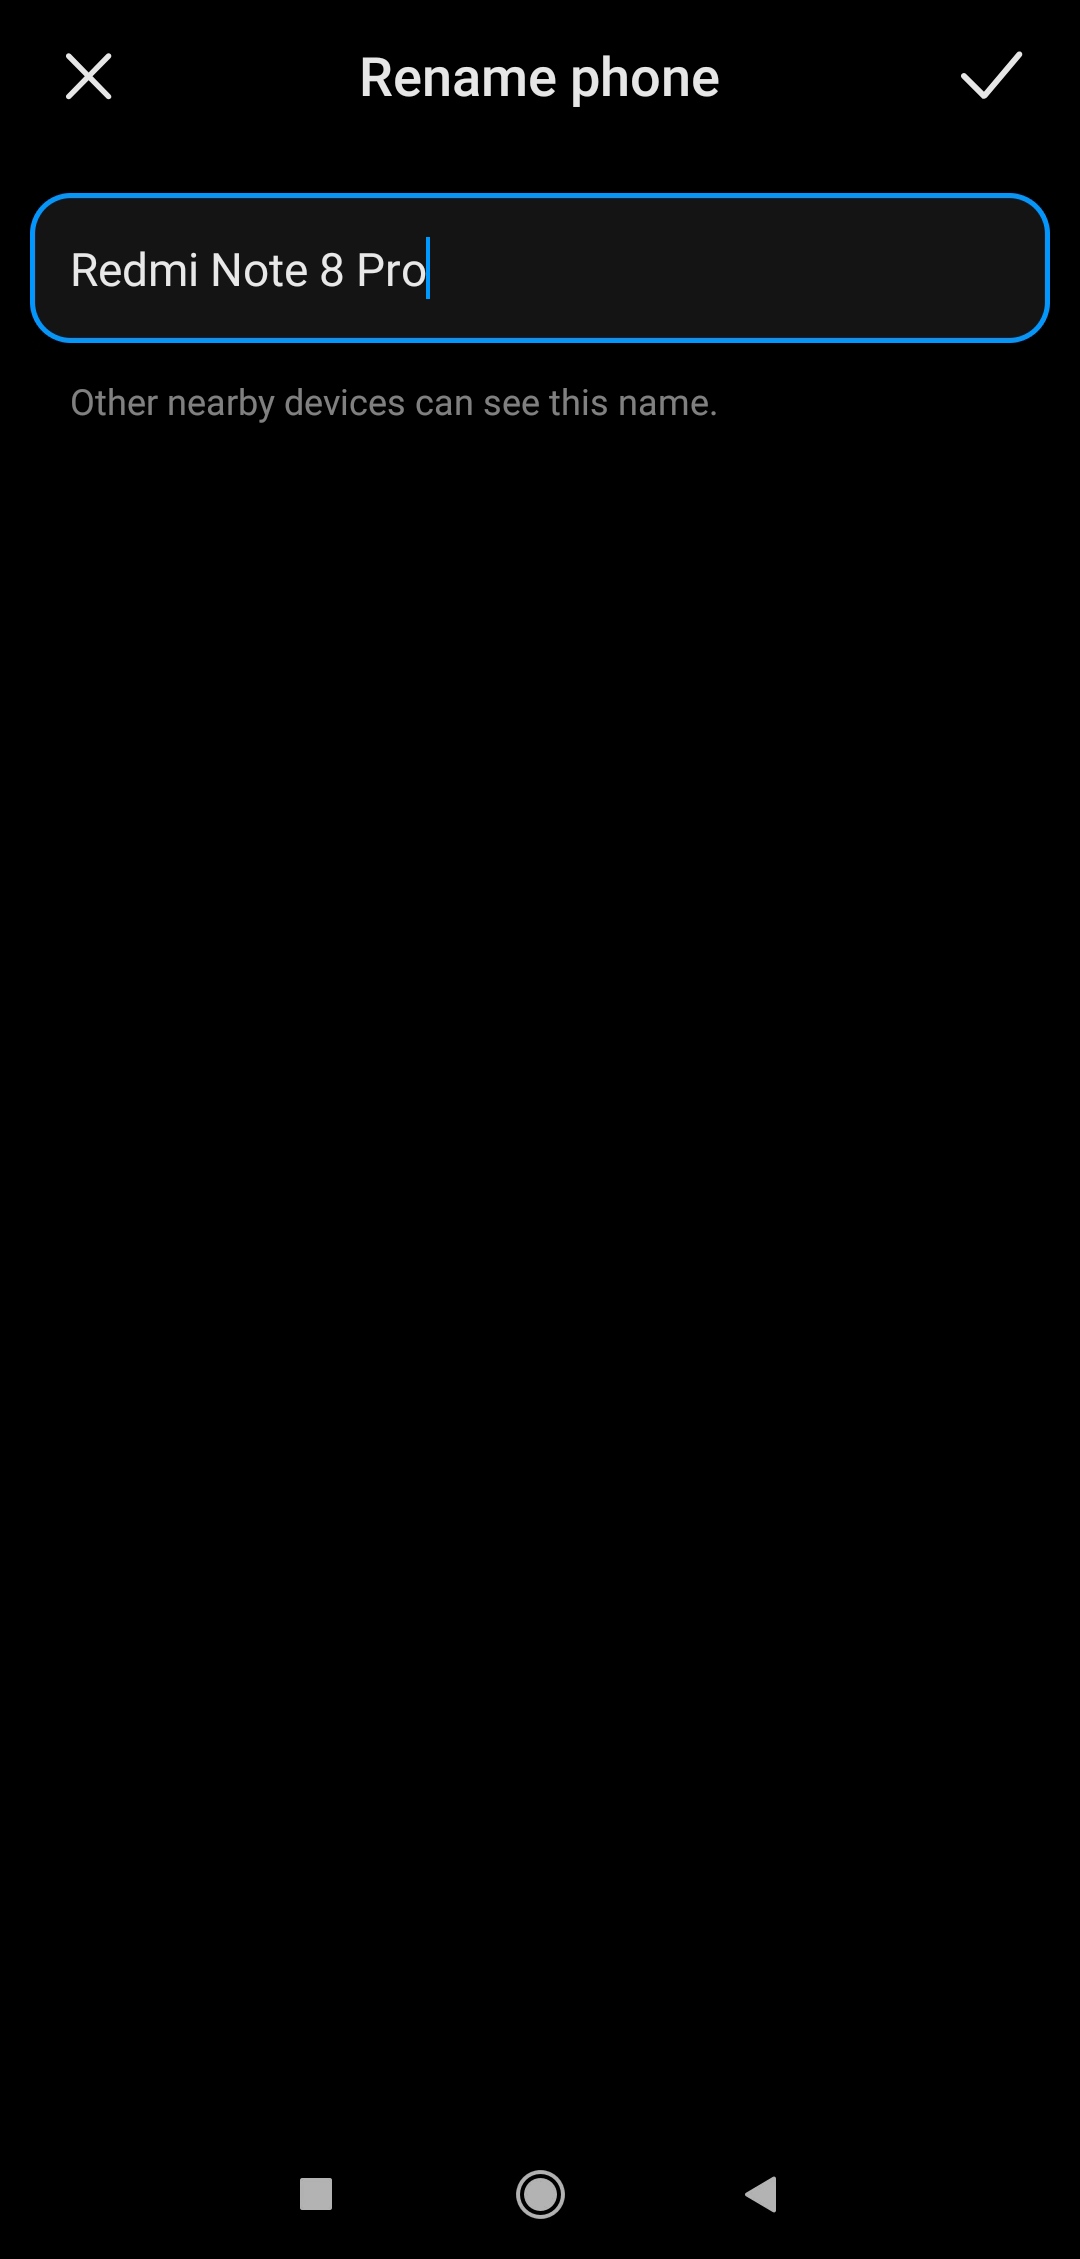
If none of the previous solutions have resolved the issue, changing the device’s name could help. Go to your device’s settings >> scroll down and tap on “Device name”. Then enter your desired name for your device and tap on “done”.
Method 6: Reset Network Settings on Android
All smartphones and tablets running one of the latest versions of Android support resetting network settings without removing apps and data. Therefore, you should consider trying this option to resolve the ‘Failed To Obtain IP Address’ error before resorting to a factory reset of your device.
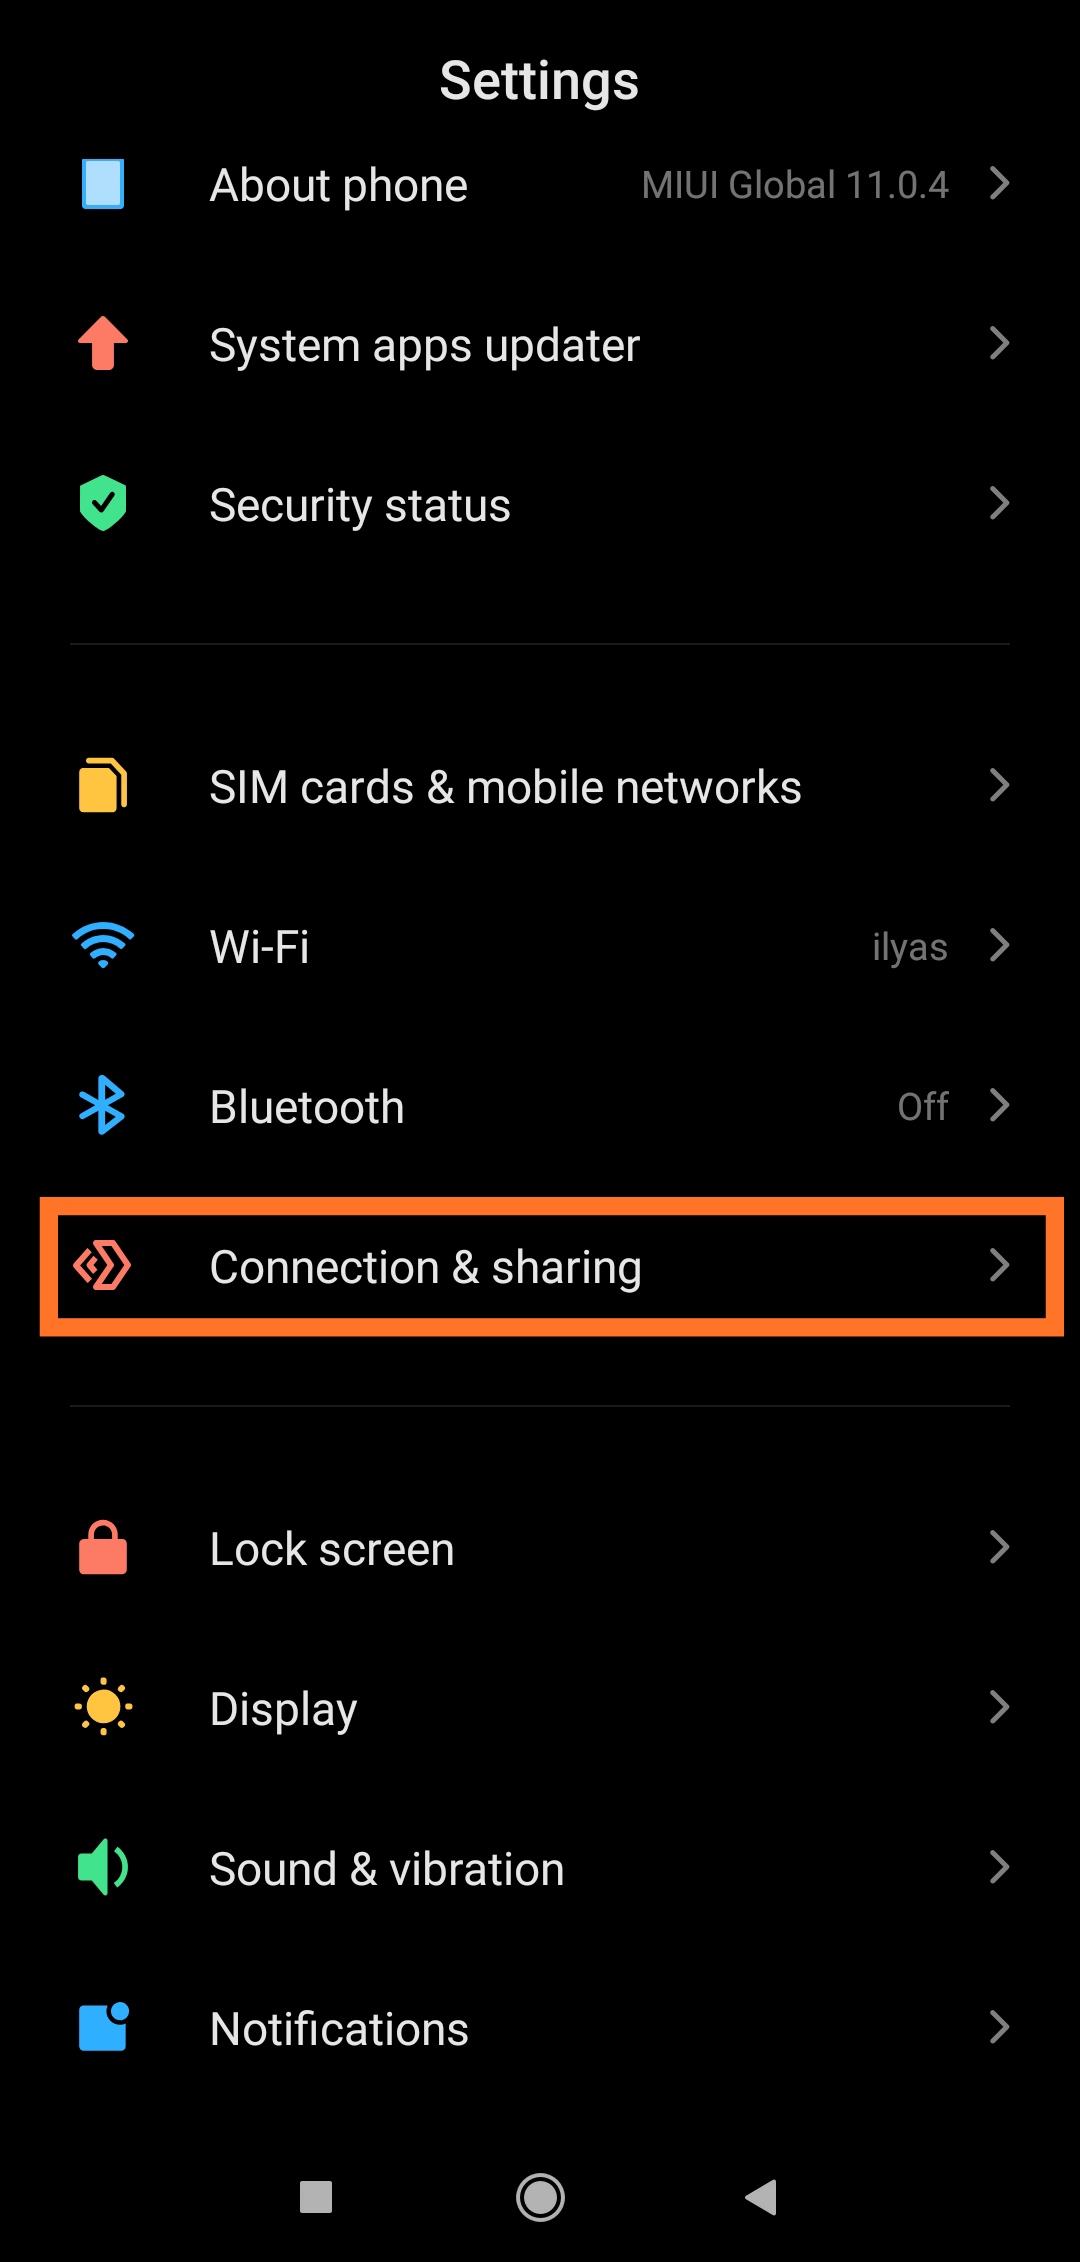
1. First, Go to device Settings and click On Connection And Sharing.
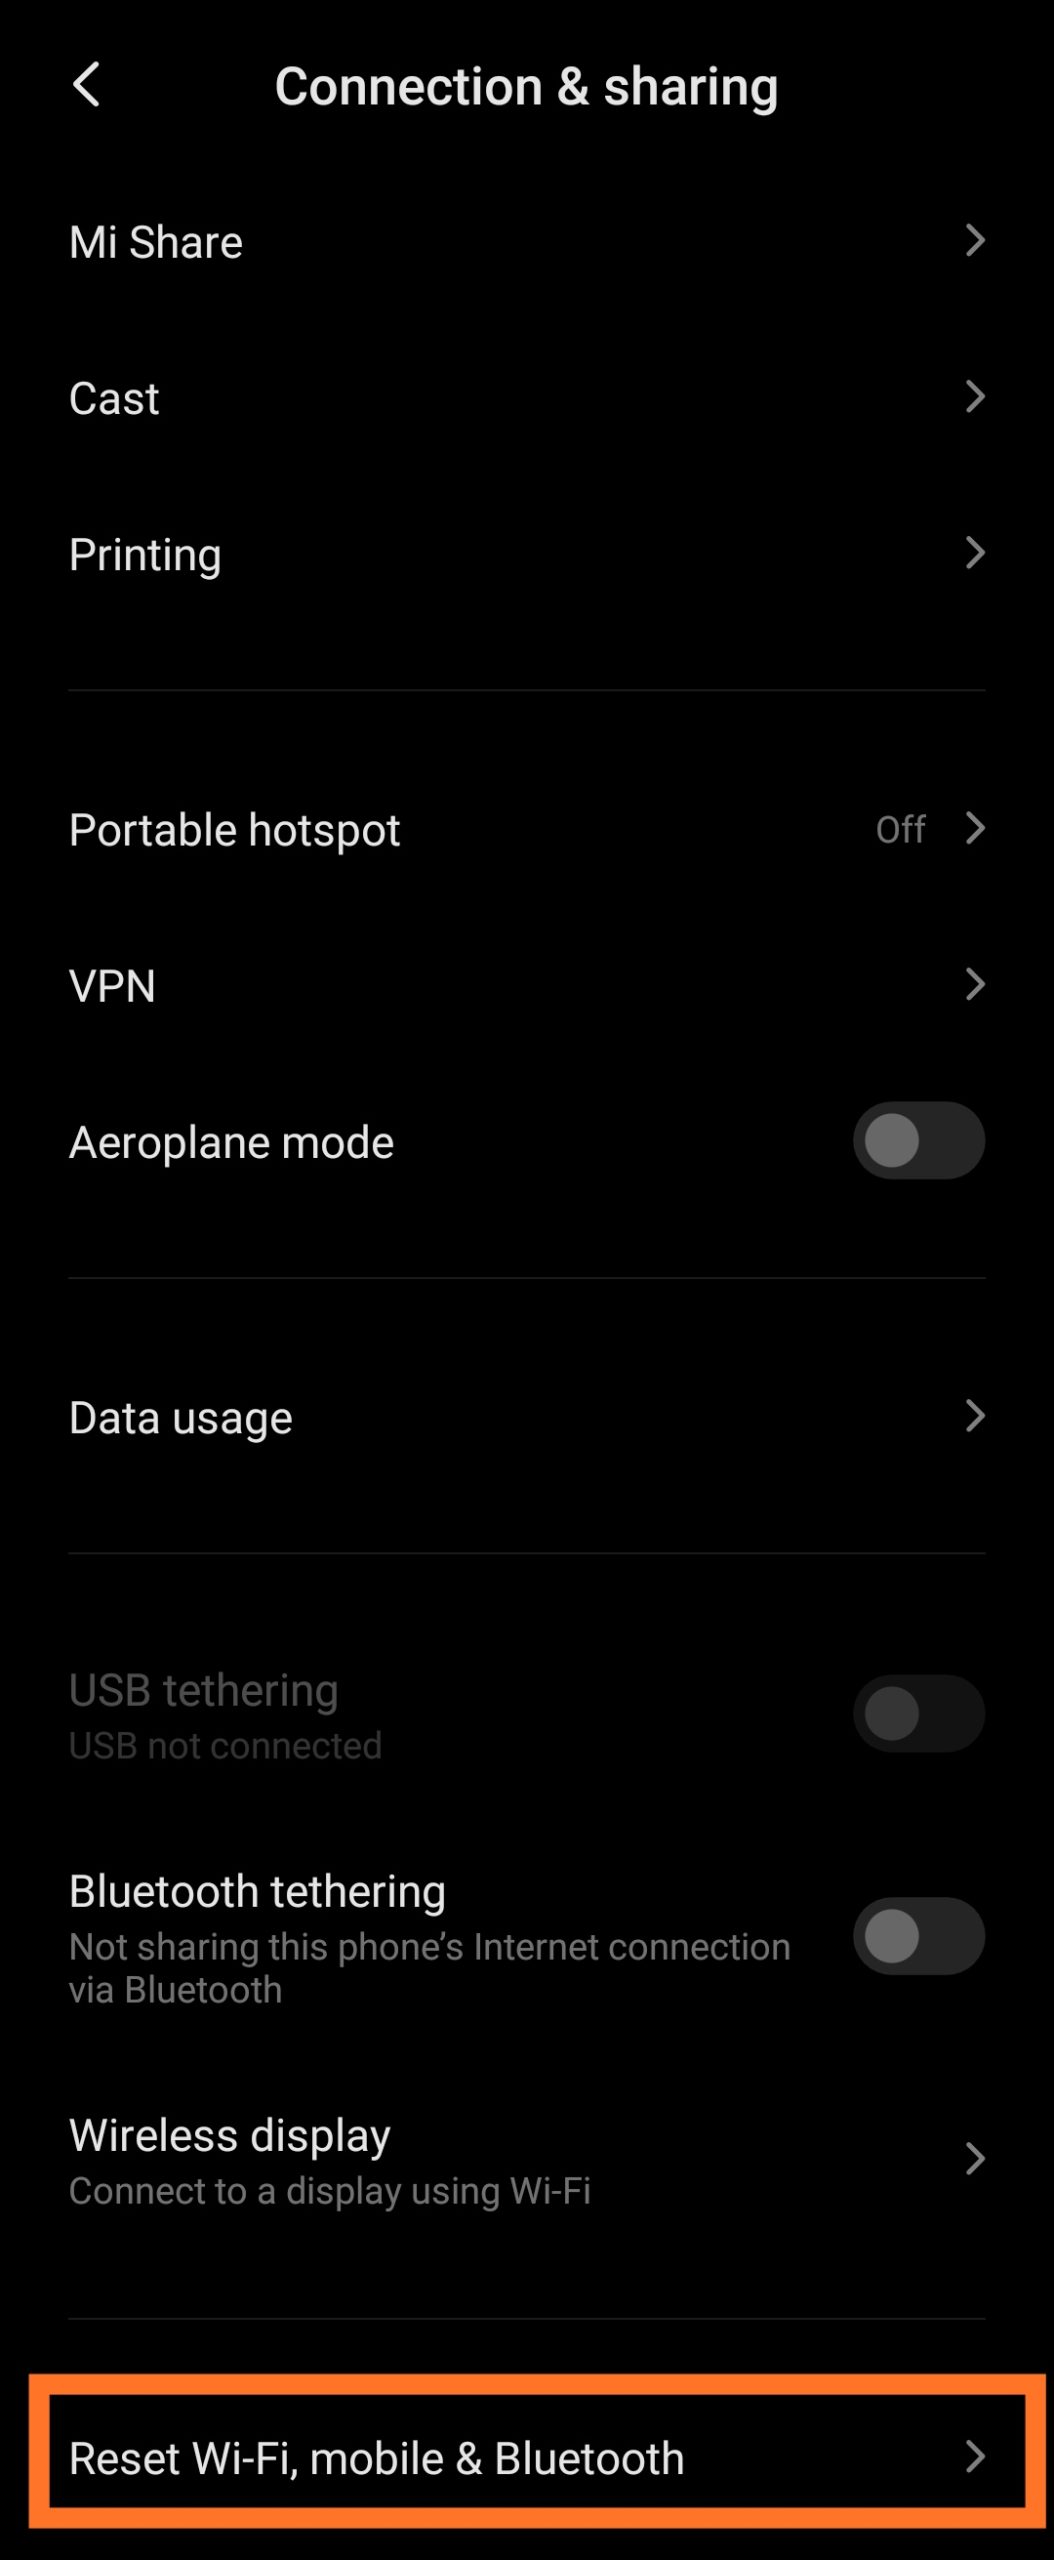
2. Then Click On Reset, Wifi, And Bluetooth option.
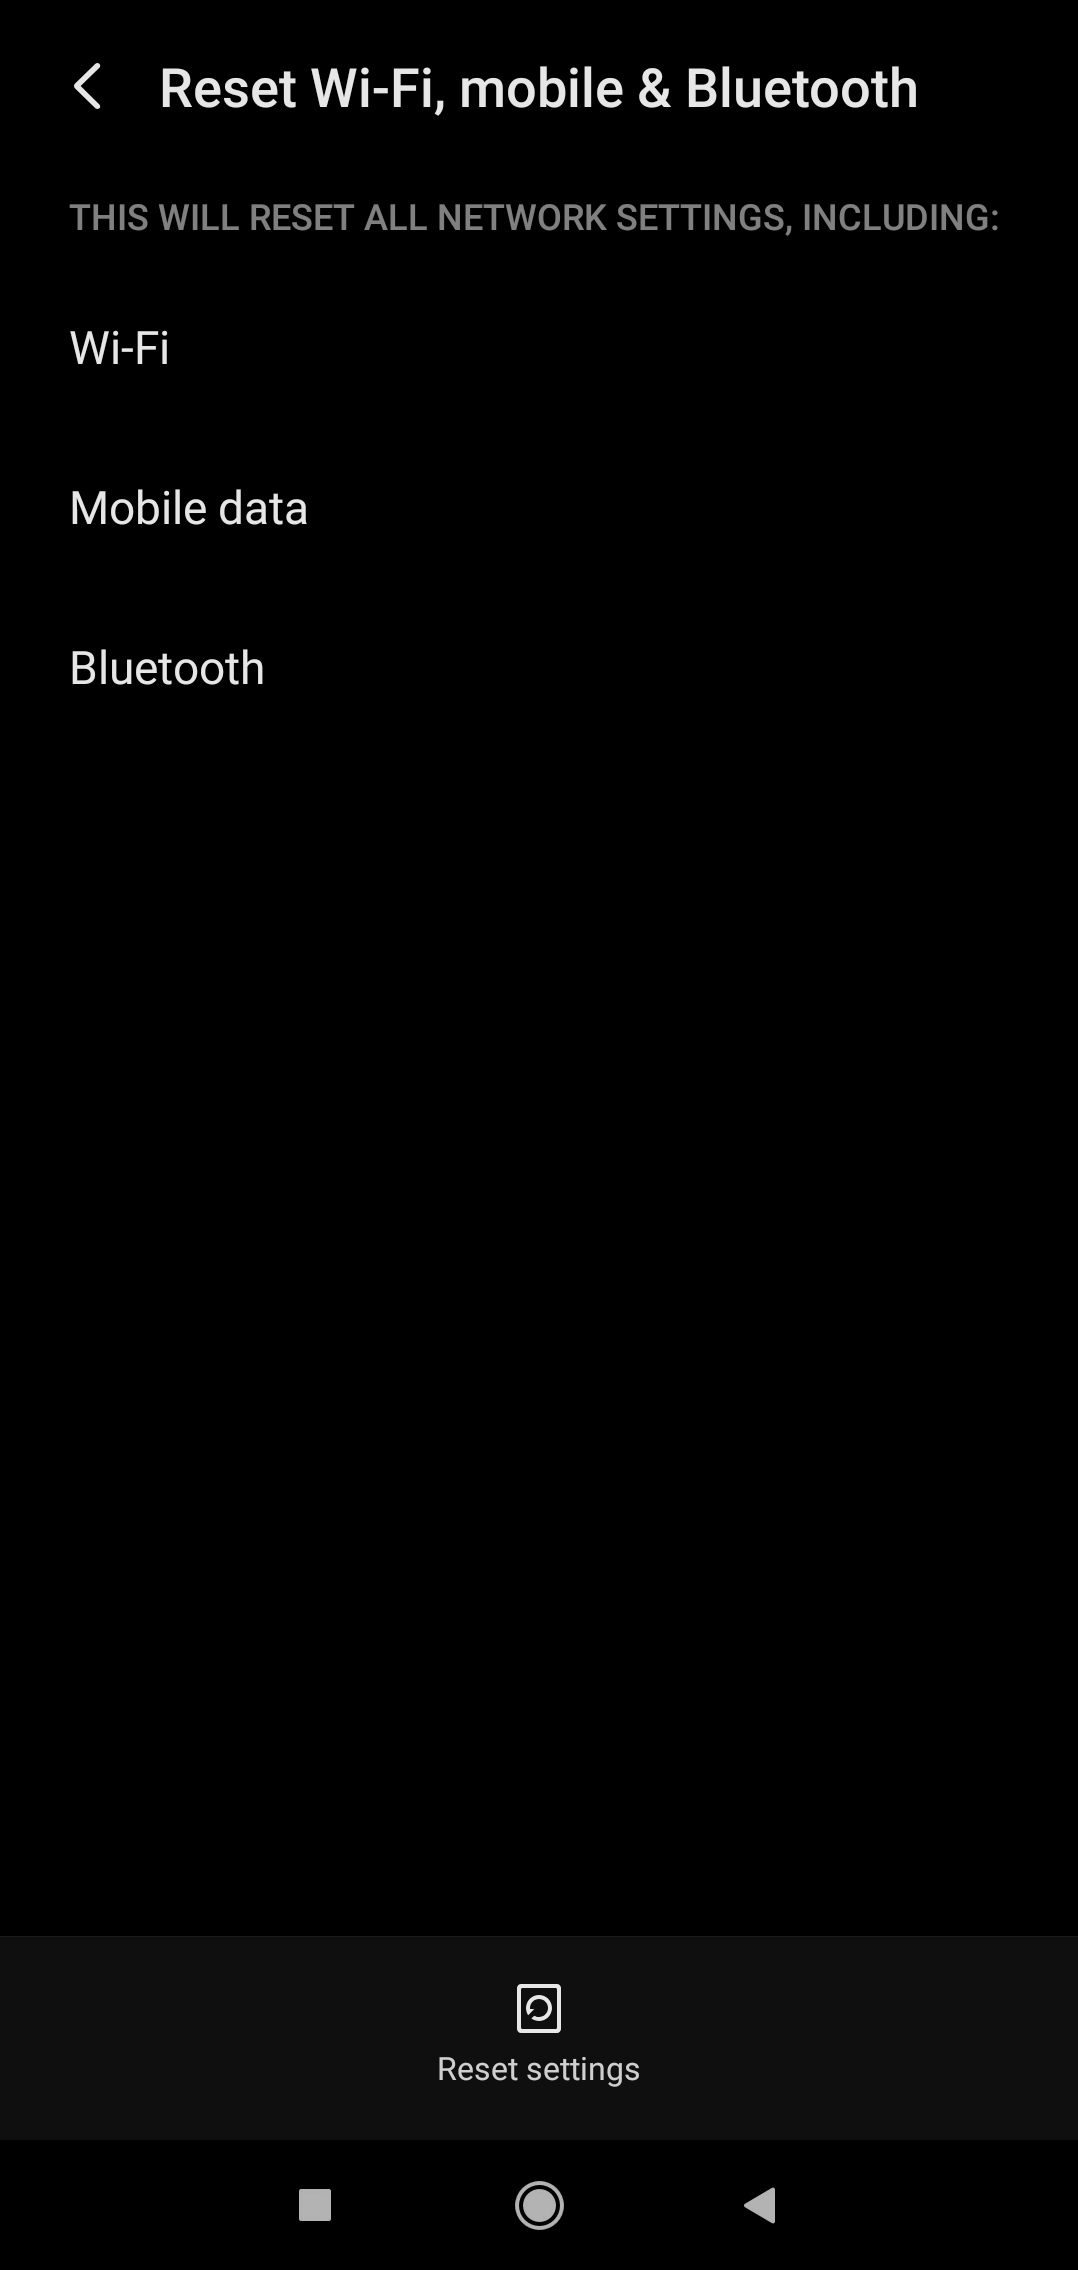
3. After that, Tap Reset Setting on The Bottom And confirm the action by entering your pattern or another security code.
Method 7: Factory Reset Your Android Device
If all the methods fail and the problem still persists, you might consider performing a factory data reset. This action will erase all data on your phone and restore it to its original factory state. Make sure to back up any essential files before proceeding.
- Open the Settings app.
- Select “System.”
- Then select “Advanced options.”
- Now Select “Reset options.”
- Select “Erase all data (factory reset).”
- Select “Reset phone.”
Wrapping Up
As you know, there are many reasons for the Failed To Obtain IP Address error and there are many ways to fix it severally. I hope that our guide assisted you in clearing the problem and you will never again see “Failed To Obtain IP Address” on your Android device.
That’s all the solutions I know. Have any of you guys tried other ways? I would love to hear about them In The Comment Section.
Frequently Asked Questions
Q1. What does it mean “Failed To Obtain IP Address?“
Ans:- The “Failed To Obtain IP Address” error normally displays when entering a Wi-Fi network, whether it is new or one you have on your device. This error message indicates the router can’t specify an IP address for your device. As long as the problem continues, the user can’t access the internet using that Wi-Fi network.
Q2. How do I fix failed to obtain an IP address?
Ans:- I Have Published An Article on This Problem Just Go And Read This Article.
