- Instagram now allow you schedule direct messages (DMs) within the app
- To schedule a message, update your app, type your text in a DM, long-press the send button, and choose a delivery date and time.
- This feature only supports text messages and allows scheduling up to 29 days in advance.
Instagram is one of the most popular social media platforms, and it’s important to stay active there to keep your audience engaged. But what if you’re too busy to send messages at the right time?
For this reason, scheduling messages is very useful. Instagram has now added a new feature to schedule DMs on Instagram. Yes, with the latest feature, you can finally schedule messages on Instagram.
Here, in this guide, I will show you step-by-step how to schedule Instagram messages.
Also, Read How to Bypass Netflix Household Rules
How to Schedule Messages on Instagram
Below are the steps to schedule your messages on Instagram, allowing you to send messages at the perfect time even when you’re not online.
1. First, make sure to update your Instagram app to the latest version. Go to your Play Store or App Store and check for updates.
2. Now, open the Instagram app and go to your Direct Messages (DMs). Then, select a chat or start a new conversation and start Typing your message.
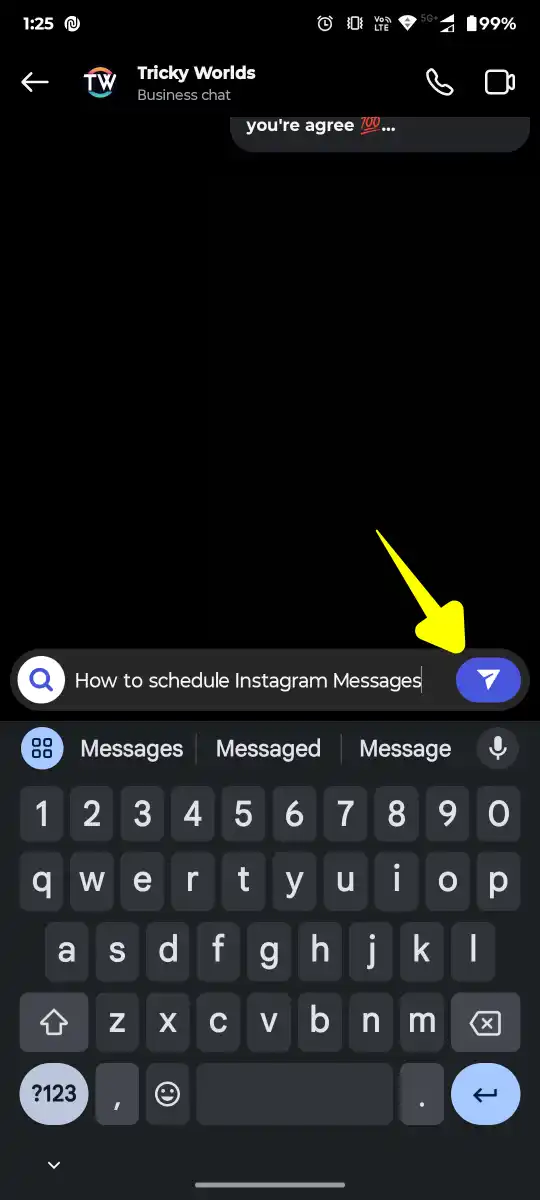
3. Now, Instead of tapping the Send button, long-press it. Then, a new scheduling menu pops up.
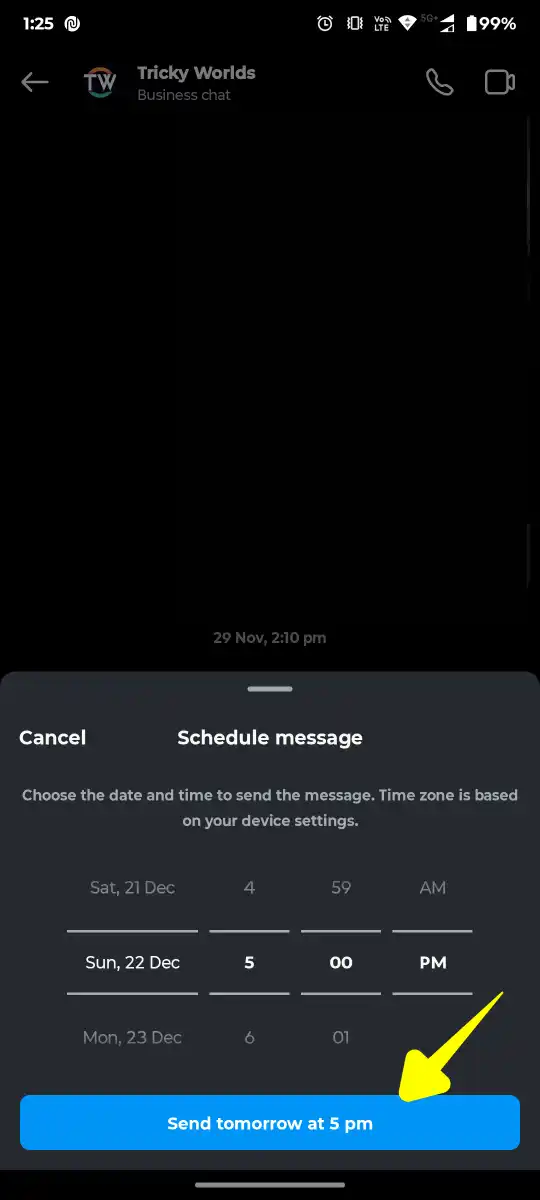
4. Select the date and time for the schedule and confirm your selection by tapping the Send button.
How to Delete Schedule Messages
If you change your mind or need to make adjustments, deleting a scheduled message is simple:
1. Go to the chat where you scheduled the message.
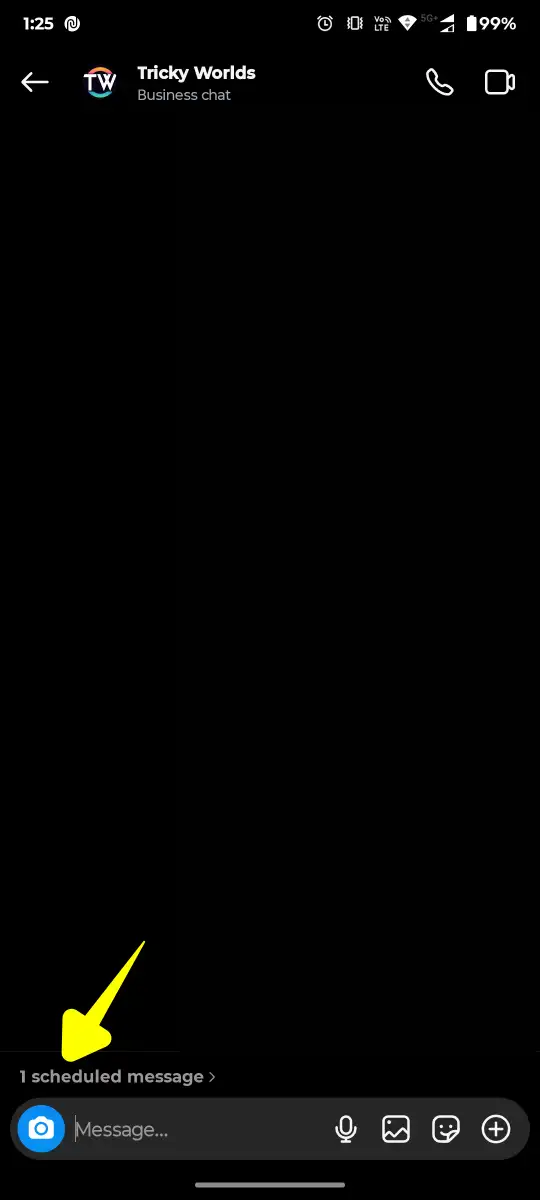
2. You’ll see a notice indicating that a message is scheduled. Tap on it.
2. From the list of scheduled messages, find the one you want to delete. Long-press the message and Tap Delete.
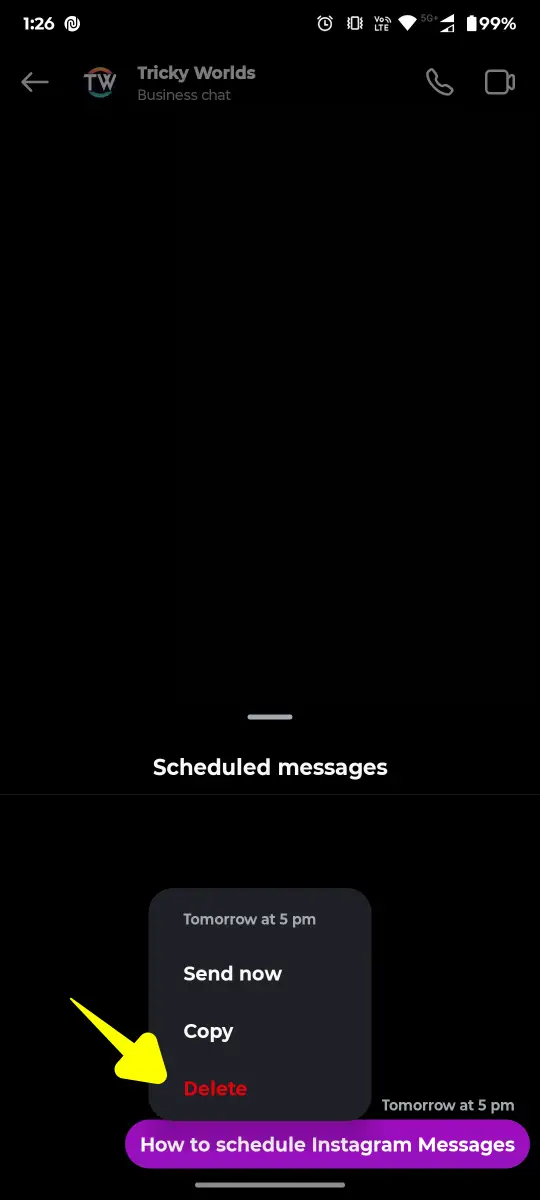
That’s it. Now the message will be removed from the queue.
What You Should Know
- Text-Only for Now: As of now, you can only schedule text messages. Media like images or videos must be sent manually.
- 29-Day Limit: Messages can be scheduled up to 29 days in advance, which is perfect for long-term planning.
Why Scheduling Instagram Messages is Useful
Scheduling your messages can keep you organized and connected with the right audience at the right time. For example, I once missed an important follow-up with a client because I was not online when they expected a response.
This means that with this new feature, such problems are now gone. You can plan in advance and ensure that your messages reach the users when they are most likely to see them.
Conclusion
Scheduling messages on Instagram is a feature you never knew you needed until you use it. It saves time and keeps you more organized and helps you stay in touch. From personal conversations to professional interactions, I find this tool quite useful.
FAQs
Can I schedule photos or videos?
No, it supports text messages only as of now.
Where can I see my scheduled messages?
Scheduled messages are marked in the chat. Tap the notice to view or manage them.
How far in advance can I schedule messages?
You can schedule a message up to 29 days in advance.
