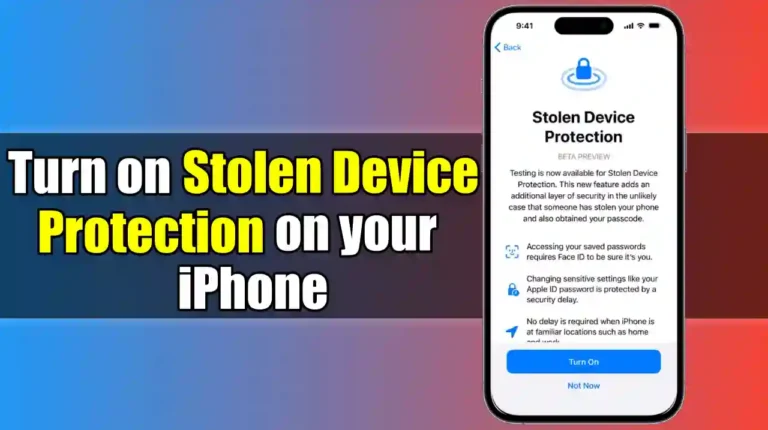
- Apple has added Stolen Device Protection in iOS 17.3 to prevent unauthorized access if your iPhone is lost or stolen.
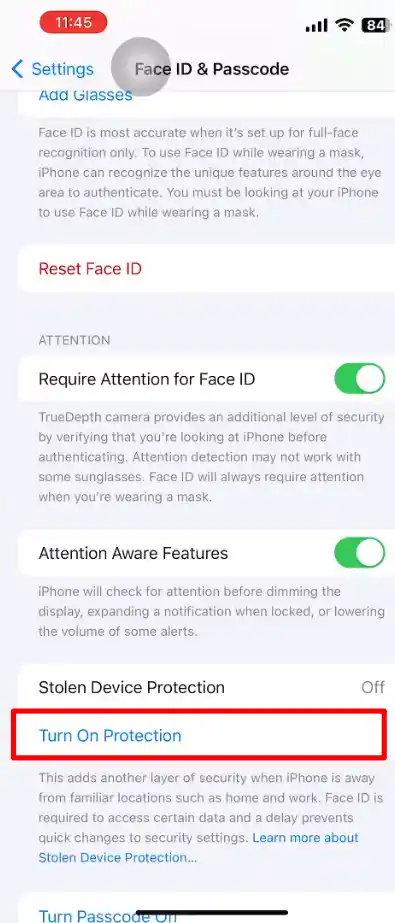
- To enable it, go to Settings > Face ID & Passcode > Stolen Device Protection and turn it on.
- The feature requires Face ID or Touch ID for important actions like changing your passcode or signing out of your Apple ID.
If you have an iPhone, you probably know how precious and personal it is. Losing or having your iPhone stolen can be a nightmare, not only because of the price of the device but also because of illegal access to your personal files and photos.
Fortunately, in iOS 17.3 and later, Apple has added a new feature called Stolen Device Protection that can help you keep your iPhone safe if it is lost or stolen. This feature prevents anyone from activating or using your iPhone without your biometric authentication, Apple ID, and password.
In this article, I will show you how to turn on stolen device protection on your iPhone and keep your phone safe from unauthorized access.
Also, Read How to Find & Delete Duplicate Photos on your iPhone
What is Stolen Device Protection, and Why Do You Need It?
Apple designed stolen device protection to prevent unauthorized access and changes to your device when it’s away from familiar locations (such as your home or office).
Even if someone gets your passcode, they won’t be able to reset your iPhone, turn off security settings, or sign out of your Apple ID without additional verification.
This feature also added a security delay where there is a one-hour time limit and requires additional biometric verification for sensitive actions. These actions include changing your passcode, signing out of your Apple ID, and adding/removing Face ID or Touch ID.
How to Enable Stolen Device Protection on iPhone
Now, To enable Stolen Device Protection and add an extra layer of security to your iPhone, follow these steps.
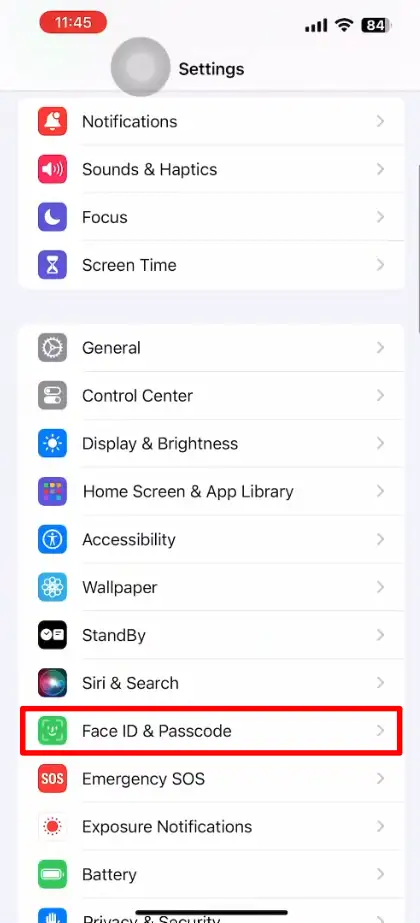
1. First of all, open the settings app on your iPhone and tap on Face ID & Passcode.
2. Next, you will be asked to enter your iPhone passcode. Just enter it.

3. Now, on the next screen, scroll down and find the Stolen Device Protection section. There tap on Turn on Protection.
4. Now again, you will be asked to authenticate yourself using your Face ID or Touch ID to activate the feature.
That’s it. You have successfully enabled Stolen Device Protection on your iPhone.
How Stolen Device Protection Works in Real-life Situations
Let’s say you’re in a busy cafe and someone snatches your iPhone. Normally, if they know your passcode (which can be guessed or peeked over the shoulder), they can:
- Disable Find My iPhone (making the device untraceable)
- Change your Apple ID password
- Reset the device to factory settings
But with stolen device protection enabled, even if they know your passcode, they can’t do any of these things. Apple will require Face ID or Touch ID multiple times for a long time before allowing changes to be made.
Conclusion
Stolen Device Protection is a security feature that will make your iPhone almost useless in the hands of a thief. Enabling it ensures that even if your phone gets stolen, your personal data, Apple ID, and payment details are secure. I recommend turning it on today. It only takes a few seconds but can save you from a major security problem.
FAQs
Does Stolen Device Protection work on all iPhones?
No, it requires iOS 17.3 or later, so older models that are on previous versions won’t have the feature.
Can I turn off Stolen Device Protection if I don’t like it?
Yes, but why would you? If you want to turn off Stolen Device Protection, go to Settings > Face ID & Passcode > Stolen Device Protection and turn it off ( it will require Face ID or Touch ID confirmation).